
.jpg) 4 hours ago
1
4 hours ago
1
![]()
Warframe's Isleweaver udpate is here, and it's going to be the biggest update for a few months now. Other than the legendary spider-frame, a brand-new Duviri spiral with its own miniboss, and a Clan Operation that kicks off today, there's a laundry list of QoL changes and big additions in this update today.
Without further ado, here are the full patch notes for Warframe Isleweaver (Update 39), listing out all the new stuff, and all systemic changes bundled with this patch.
Warframe Islewaver (Update 39): Everything new and all changes
NEW DUVIRI NODE: ISLEWEAVER
A familiar face, an unlikely ally. Dominus Thrax calls for aid — the Kingdom of Duviri has been invaded by the Murmur, led by the newly resurfaced Major Neci Rusalka. Don the Hero of Duviri mantle once more as you face off against this new threat.
Prerequisite: The Hex Quest must be completed to access this node.
Scholar’s Landing, a once-forgotten isle of Duviri, is now under Rusalka’s control. Here the Murmur’s influence is strongest, and here you must put up your strongest offence.
 Scholar's Island (Image via Digital Extremes)
Warframes in Duviri
While in the Isleweaver node, your Warframes take the spotlight. Select your loadout from the available equipment in Teshin’s Cave, and gain access to them immediately upon stepping foot into Duviri. While Dominus Thrax has graciously allowed your Warframe into his Kingdom, Companions and Gear Items remain unwelcome in his realm.
As Gear cannot be used, the Gear Wheel input can be used instead to summon your Kaithe!
 Iselweaver option (Image via Digital Extremes)
Isleweaver Node
The Isleweaver node brings you into a new story: the tale of The Triumph of Dust. Rusalka aims to write a new ending in her favor, and you’re tasked with stopping her. Isleweaver mirrors The Lone Story mission structure, but with a twist: play through six objectives and face a formidable foe at the end.
- Duviri Objective
- Duviri Objective or Undercroft
- Duviri Objective or Undercroft
- Duviri Objective or Undercroft
- Oraxia’s Lair
- Duviri Objective or Undercroft
- Summon The Fragmented
Many of your objectives will feel familiar, but are corrupted by Rusalka’s touch. Oraxia’s Lair is a required objective in every Isleweaver session, and involves depictions of spider-like creatures. Please be aware. To learn more about this fight, we’ve detailed it in the “New Mini-Boss: Oraxia’s Lair” section below!
In lieu of the Orowyrm, face off against two of The Fragmented* at once to complete the Spiral.
Isleweaver offers the following guaranteed rewards upon completion:
- Scuttler Husks (3-5 on Normal Path, 5-8 on Steel Path)
- Pathos Clamps (10 on Normal Path, 15 on Steel Path)
- 5 Steel Essence (Steel Path Only)
Players also receive items from Oraxia’s droptables, awarded upon opening the chest at the end of The Fragmented fight. Below is a list of key items that drop from Oraxia, but refer to the official Drop Tables Site for full details:
- Oraxia main and Component Blueprints
- Scyotid main and Component Blueprints
- Spinnerex main and Component Blueprints
- Temporal Dust (new resource)
- Enigma Gyrum
Since this node mirrors The Lone Story, side objectives are not available to play. Keep on-mission, kiddo.
*Note: The Fragmented in Duviri have a separate drop table from their Deimos counterparts, meaning the Cavia Arcanes will not be obtainable from this fight.
Contain the Threat
The rest of Duviri must be protected from Major Neci Rusalka’s hold. As such, The Triumph of Dust has been contained from the rest of the landscape. Players will be unable to journey to other parts of Duviri whilst playing the Isleweaver node.
While you can’t explore the rest of Thrax’s Kingdom in Isleweaver, there is still much to uncover. Secrets are littered throughout Scholar’s Landing, tokens of Rusalka’s influence. A keen eye (or ear) can suss them out.
New Resources
Two new resources are available from the Isleweaver node: Scuttler Husks and Temporal Dust.
Scuttler Husks:
Earned upon defeating The Fragmented at the end of the Isleweaver Spiral, Scuttler Husks can be exchanged for a variety of rewards.
Visit Dominus Thrax and/or Acrithis to spend your Scuttler Husks on the following:
- Oraxia’s Main and Component Blueprints
- Scyotid’s Main and Component Blueprints (Thrown Secondary)
- Spinnerex’s Main and Component Blueprints (Whip Melee)
- Thalys Incarnon Heavy Scythe Weapon Blueprint
- Captura Scenes:
- Duviri Throne Room Scene
- Octopede Arena Scene
- Scholar’s Landing Scene
- Isleweaver Cloud Islet Scene
- Isleweaver Drift Atoll Scene
Temporal Dust:
The dust of decayed universes, rich in entropy. Entrati’s research postulates it as the animating agent of the nightmarish Murmur.
Temporal Dust drops from The Murmur in the Isleweaver mission, and is a crafting component for new content introduced in this update.
New Mini-Boss: Oraxia’s Lair
“Oraxia. The Scholar's pet. I heard the Usurper imitating his voice. The spider is her servant now.”
Descend through the webbed maw when the time is right during the Triumph of Dust story spiral in the Isleweaver Duviri node. Here you will face Oraxia, Albrecht’s guardian Warframe, who served him during his time in Duviri. Driven mad by the feverish whispering of the Indifference, she now serves Major Neci Rusalka.
Successfully taking down Oraxia and her Scuttlers will earn you Scuttler Husks* to redeem with Dominus Thrax and/or Acrithis in the Dormizone for Oraxia’s Blueprints, as well as Blueprints for her signature weapons — the Spinnerex Whip and Scyotid Secondary.
*Note: Scuttler Husks are awarded upon completion of the Isleweaver Spiral, similar to Kullervo’s Bane.
New Murmur Enemy: The Unseeing Herald
 New Murmur enemy (Image via Digital Extremes)
The Unseeing Herald proclaims the will of the Indifference, uttering its twisted desires in Voidtongue. Who among us has heard its whispers?
You’ll encounter this new Murmur enemy in the Isleweaver Duviri node. Much like the other Murmur enemies in Scholar’s Landing, they drop Temporal Dust (a new resource used to craft Oraxia, her weapons, and the new Thalys Incarnon).
OPERATION: EIGHT CLAW
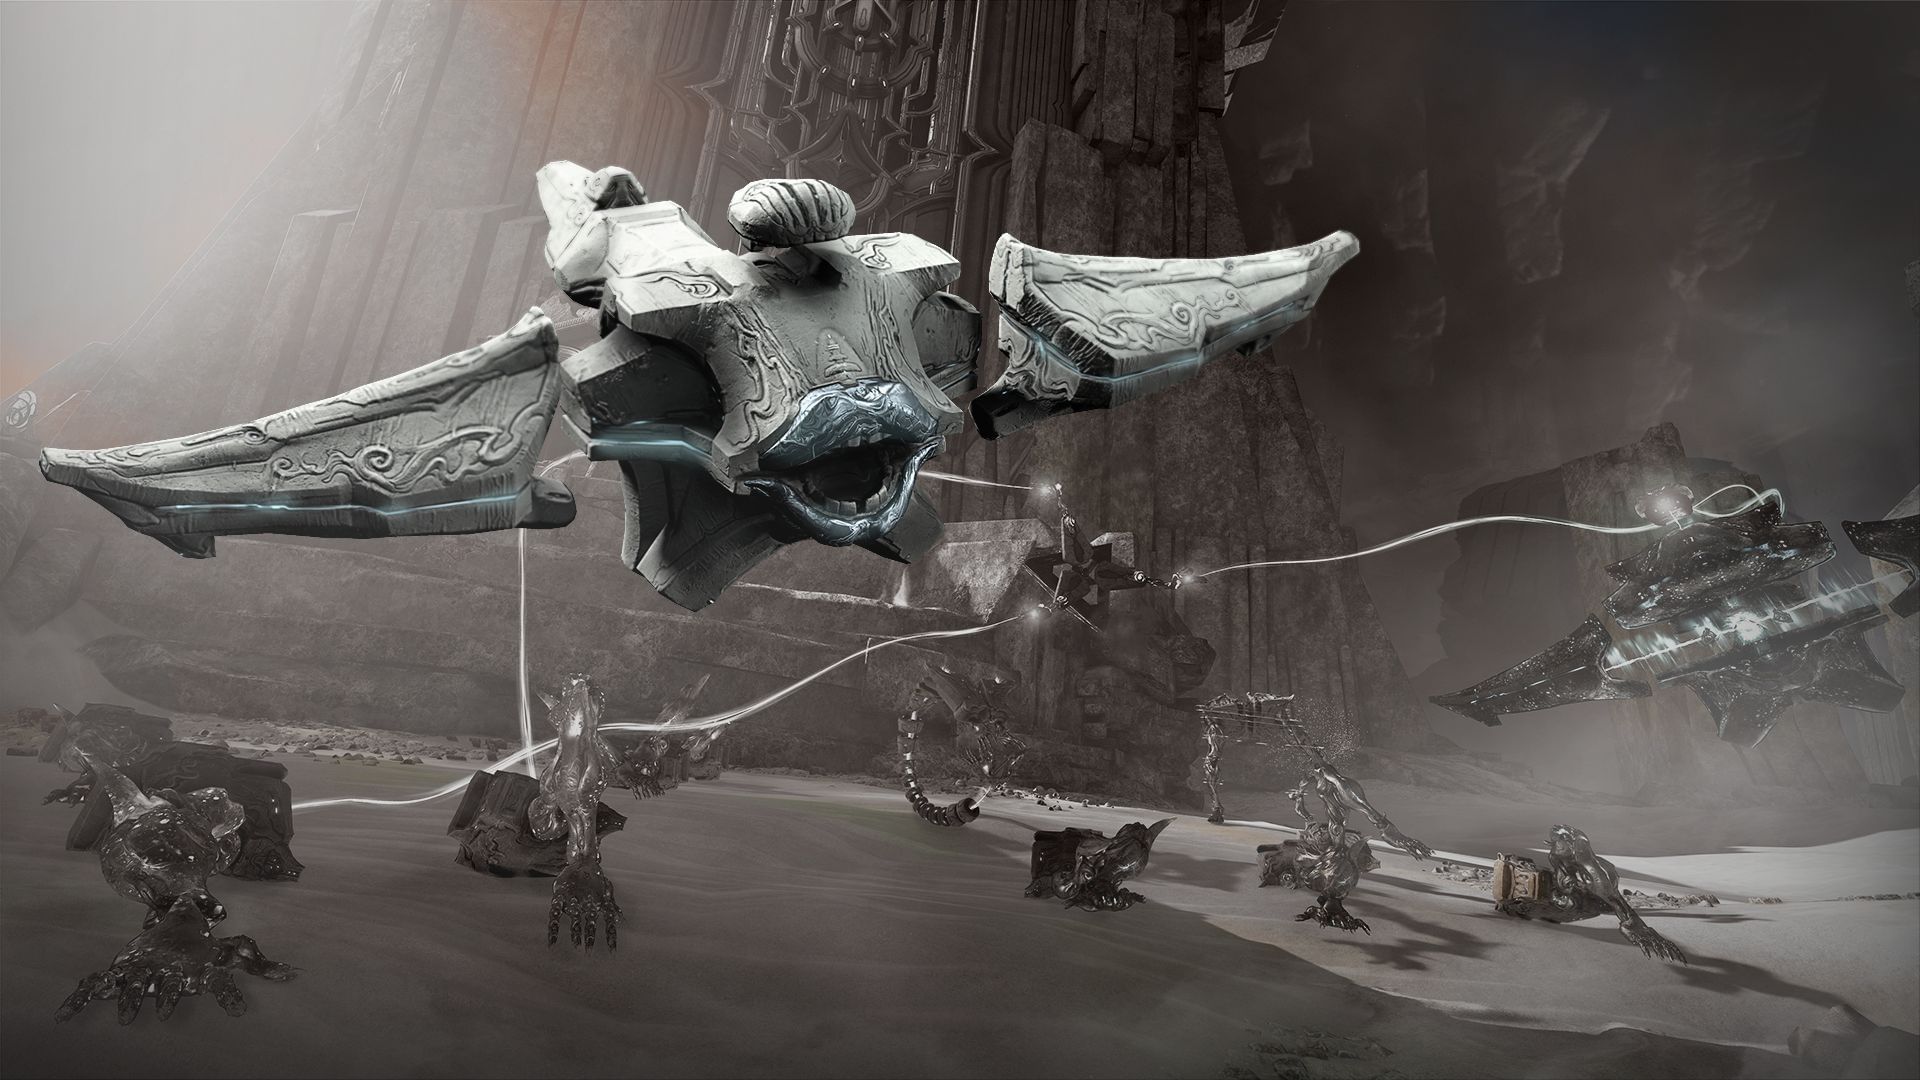
 Duviri is in grave peril, and Dominus Thrax calls for the help of the Drifter (Image via Digital Extremes)
Runtime: JUNE 25TH @ 11:30am ET - JULY 16TH @ 11:30pm ET
Prerequisite: The Hex Quest must be completed to access the Operation in the Isleweaver node.
After players complete The Hex Quest, the Isleweaver node will appear in Duviri’s Navigation, where Operation: Eight Claw takes place. After Operation: Eight Claw has concluded, the Isleweaver node will remain accessible from Duviri’s Navigation.
While Operation: Eight Claw is live, players can earn a special resource called Dominus Aureus while fighting in Scholar’s Landing, which is used to trade with Dominus Thrax for Operation specific rewards (more on that in the Rewards section).
What You Need to Do
Players will start in the familiar cave of Duviri but with a visitor — Dominus Thrax himself! To expedite the swift removal of Rusalka from the Kingdom of Duviri, Thrax is allowing you use of your Warframes in Duviri without restriction! Pick your loadout for the fight ahead and head through the portal.
You will face a pre-selected set of objectives to progress through the island, including a faceoff with Oraxia. The objective types are randomized per run, but each will include a fight with Oraxia as the 5th to complete, and a final showdown with a familiar Murmur boss.
- Duviri Objective
- Duviri Objective or Undercroft
- Duviri Objective or Undercroft
- Duviri Objective or Undercroft
- Oraxia’s Lair
- Duviri Objective or Undercroft
- Summon The Fragmented
Unlike the main island in The Duviri Experience, you will not have access to side objectives.
Once you complete all of the objectives, you will be presented with a chest to claim your reward of 18-22 Dominus Aureus! (22-26 Dominus Aureus on Steel Path).
Community Progress
Operation: Eight Claw comes with a Community Progress segment, tracking the total Dominus Aureus spent by players.
As the total number spent ticks up, progress is made towards unlocking the three variants of the Invictus Signa.
Once a Signa has been unlocked, it becomes available for purchase from Dominus Thrax in the Dormizone.
- Invictus Signa unlocks at 30% community progress
- Invictus Emergent Signa unlocks at 60% community progress
- Invictus Apex Signa (pictured above) unlocks at 90% community progress
Community progress can be tracked in the Event tab in Navigation!
Rewards
While Rusalka hoards the throne, Dominus Thrax has taken refuge in the Dormizone (located to the immediate right once you pass the kitchen doors). As you fight towards reclaiming Scholar’s Landing, you can collect a variety of offerings from Thrax himself. He also offers rewards from previous Operations!
Spend your Dominus Aureus on:
- NEW: Invictus Signas - there are three variants that unlock with community progress:
- Invictus Signa (30% community progress)
- Invictus Emergent Signa (60% community progress)
- Invictus Apex Signa (90% community progress)
- NEW: Phelonyx Parazon Skin
- NEW: Eight Claw Sigil
- NEW: Eight Claw Emblem
- 5 Pathos Clamps (Purchase limit of 20 per player)
- Krios Signa
- Prominence Wisp Totem
- Fluctus Rahk Skin
- Ceti Lacera Blueprint
- Basmu Blueprint
- Stance Forma Blueprint
- The Ballroom Simulacrum
- Arcane Victory
- Arcane Strike
- Arcane Awakening
- Arcane Guardian
- Arcane Phantasm
- Arcane Eruption
- Arcane Agility
- Arcane Acceleration
- Arcane Trickery
- Arcane Velocity
- Arcane Precision
- Arcane Pulse
- Arcane Ultimatum
- Arcane Aegis
- Arcane Arachne
- Arcane Rage
- Arcane Fury
- Arcane Avenger
- Arcane Energize
- Arcane Grace
- Arcane Barrier
Note: Compared to previous Operations, we have removed Common Arcanes from this redemption store. We have also reduced the number of purchasable Arcanes from 42 of each Arcane to 21 (essentially, one full Arcane instead of two full Arcanes).
After Operation: Eight Claw has ended on July 16th @ 11:30 AM ET, Dominus Thrax will stick around until July 23rd and continue to sell his wares. After July 23rd, he will leave the Dormizone, taking his Operation-exclusive rewards with him. Acrithis, in her usual spot in the Dormizone, will remain as the permanent vendor for Scuttler Husks. Learn more about Scuttler Husks in the “New Resources” section above.
Clan Trophies
During Operation: Eight Claw, the spending of Dominus Aureus will also contribute to your Clan goal. Completing goals will earn your Clan an Eight Claw Trophy of various tiers. Like previous Operations, Clan Trophies are available in Terracotta, Bronze, Silver, Gold.
The amount of Dominus Aureus to spend to unlock each tier is as follows:
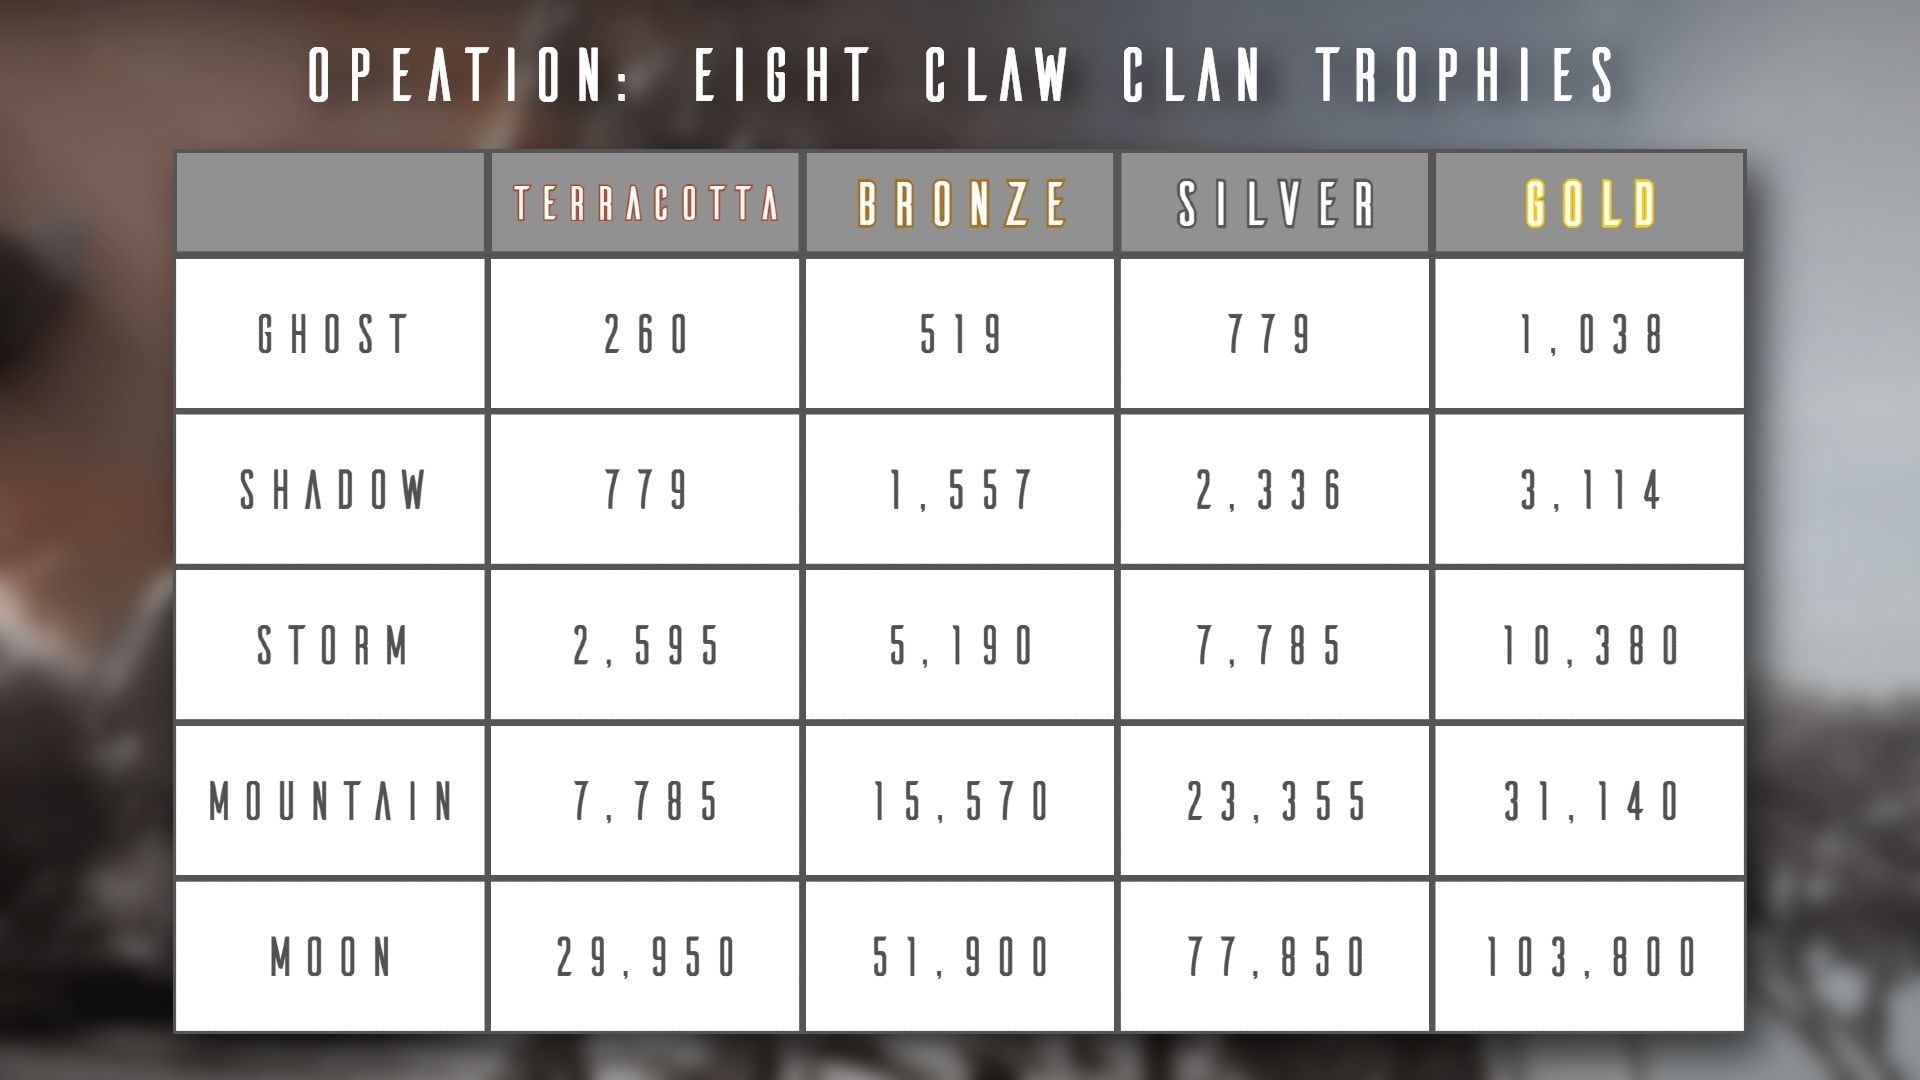 Clan reward table (Image via Digital Extremes)
As usual, lowering your Clan tier is disabled now until the Operation concludes.
Share your Feedback & Bug Reports on Operation Eight Claw in the dedicated Feedback Subforum.
Once Operation: Eight Claw has concluded, the Isleweaver node will remain intact in Duviri’s Navigation so players may return for Scuttler Husks, Pathos Clamps, Oraxia’s Blueprints and more. Read on to learn more!
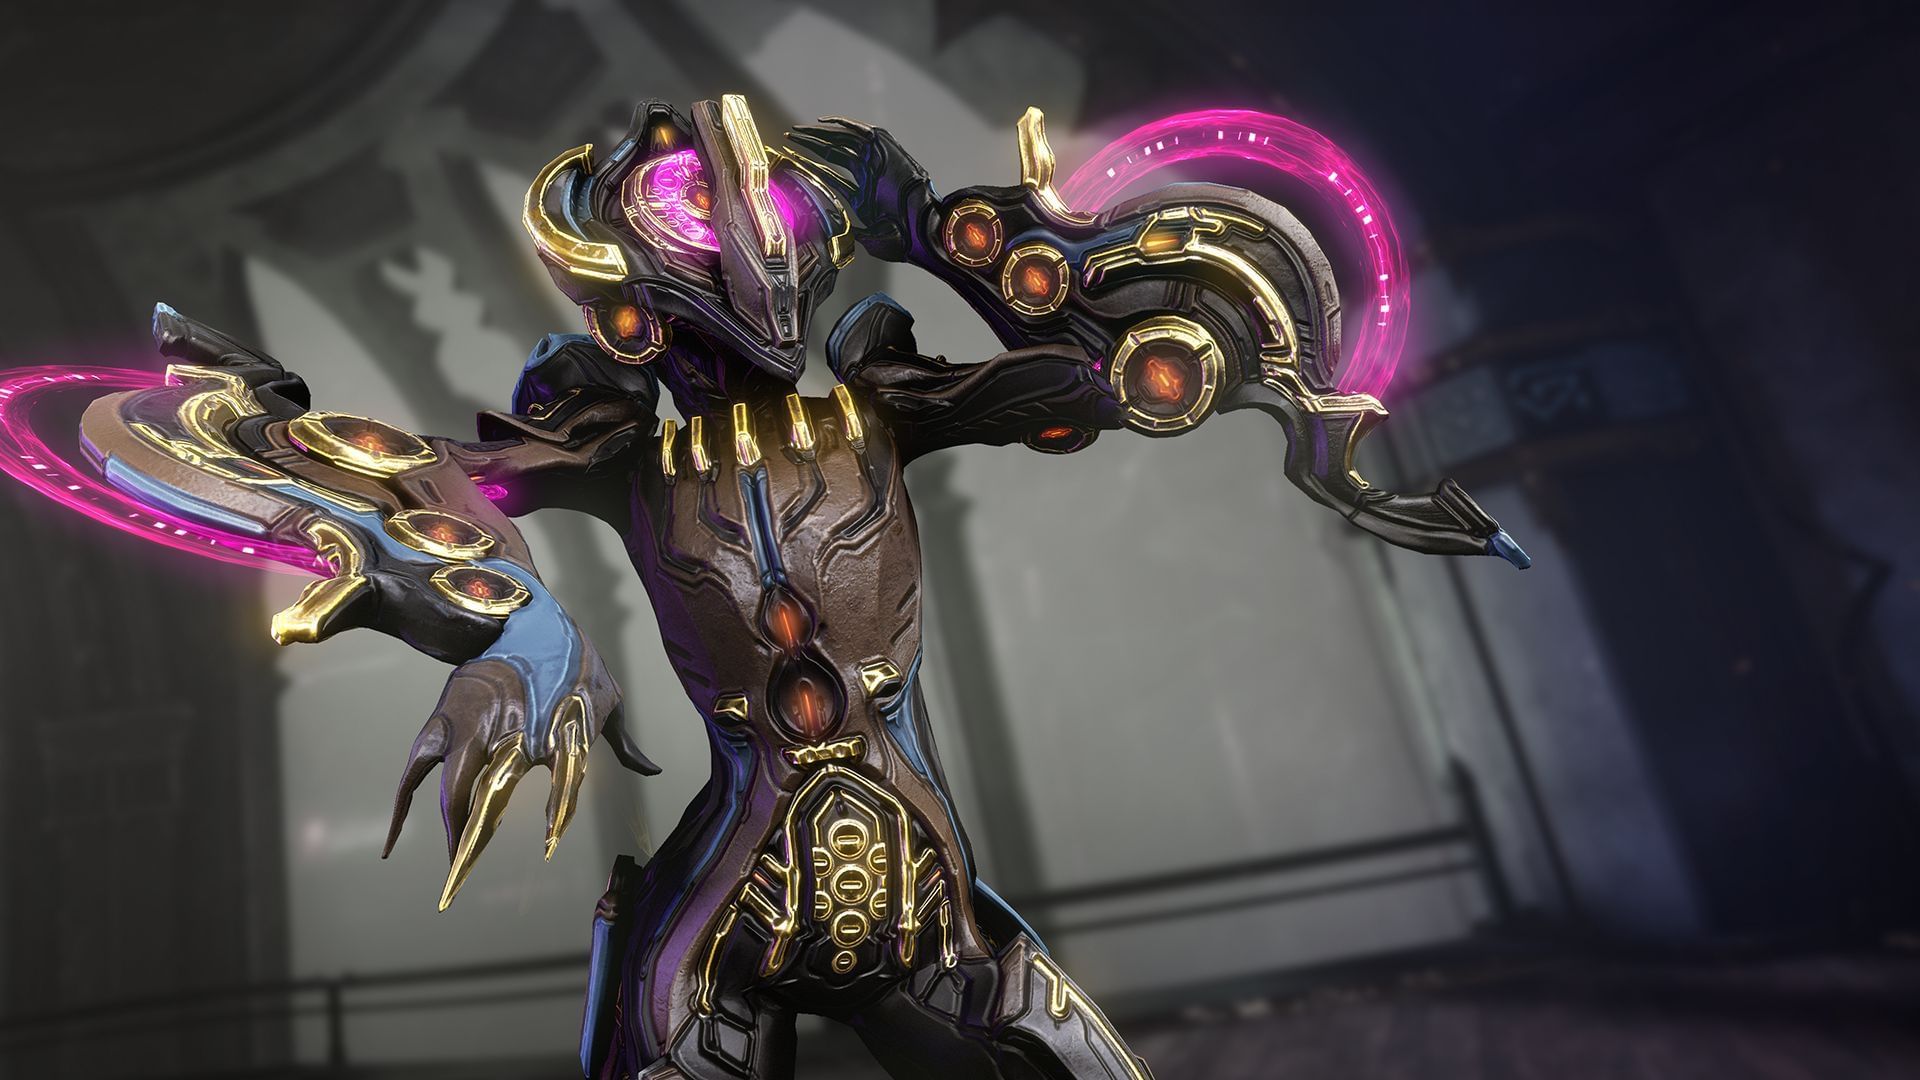
NEW WARFRAME: ORAXIA
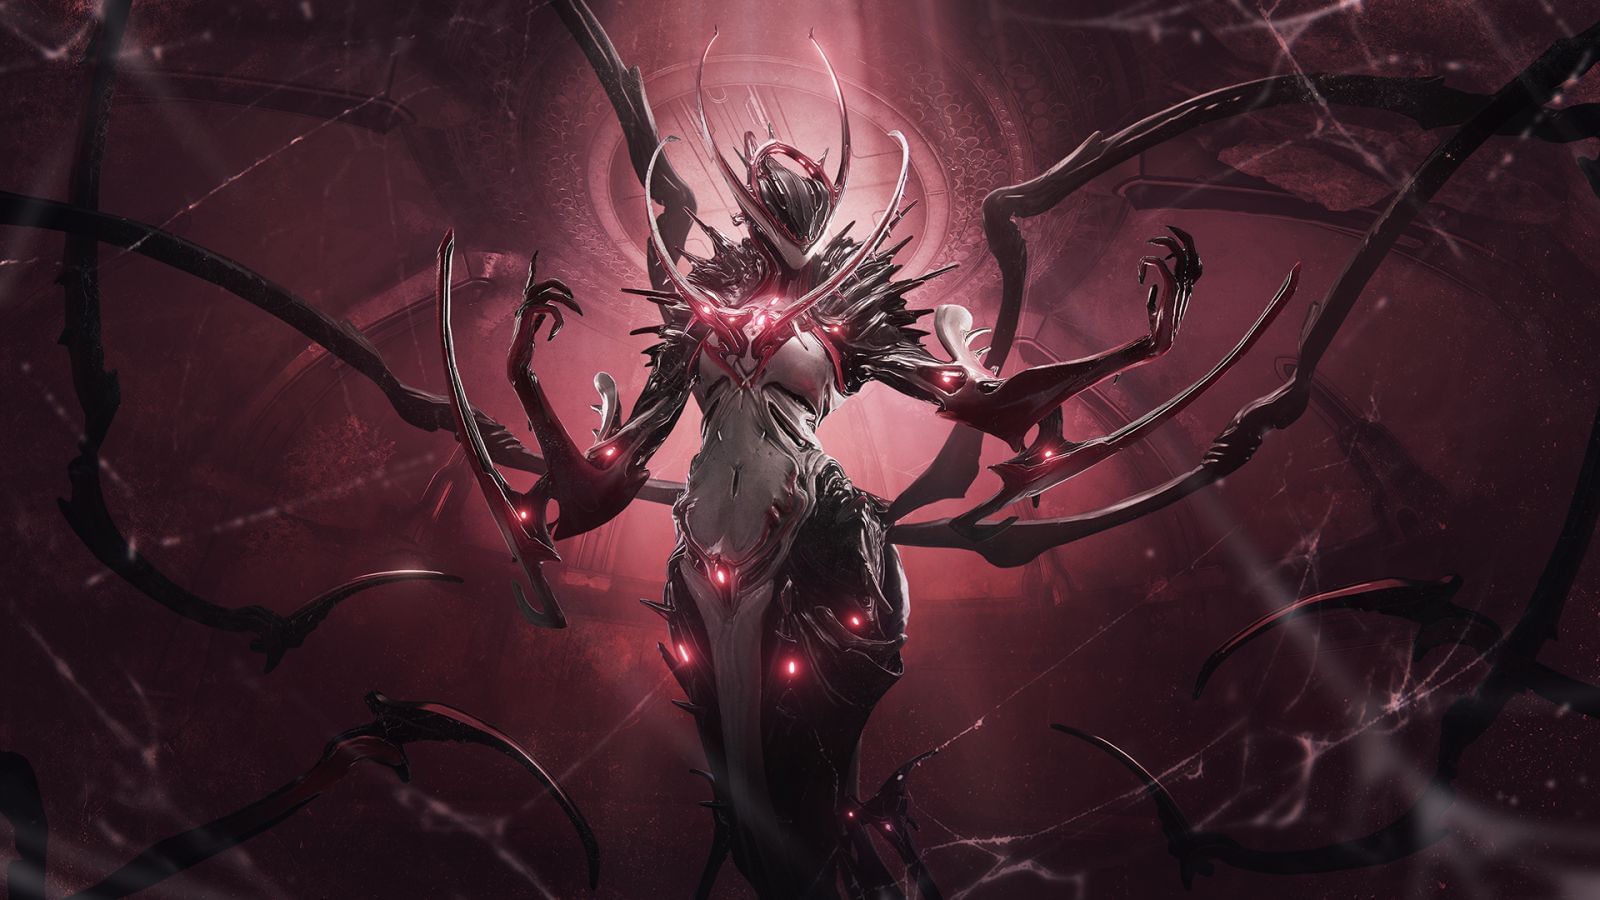 The Scuttler his here (Image via Digital Extremes)
Sinister grace interwoven with lethal versatility; the evolution of a perfect predator. Fear’s name is Oraxia.
Oraxia’s Abilities
Passive
Wall Latching grants Predator’s Lurk, rendering Oraxia invisible for 8s.
Ability 1: Mercy’s Kiss
Leap onto an enemy and pierce them with Oraxia’s spider legs, dealing Toxin Damage. Enemies defeated by this attack have a chance to drop Health or Energy Orbs.
Ability 2: Webbed Embrace*
Oraxia throws a creeping web to ensnare her prey. Enemies caught within the widening radius are trapped inside a cocoon that increases their Damage Vulnerability.
*This is Oraxia’s Helminth and Railjack ability.
Ability 3: Widow’s Brood
Oraxia launches a barrage of stinging darts in front of her that applies Toxin Status Effect. Poisoned enemies spawn Scuttlers when killed.
Ability 4: Silken Stride
Unfurl Oraxia’s spider legs and go on the prowl. Oraxia is immune to Status Effects and has increased Maximum Health. Ranged Weapons are imbued with Toxin Damage. Killing enemies causes them to burst with Toxin.
Silken Thread: Tap Dodge to leap to a targeted surface.
How to Acquire Oraxia
- Oraxia’s main Blueprint and Component Blueprints can be acquired via the Isleweaver drop tables, requiring players to defeat The Fragmented to receive drops.
- Trade Scuttler Husks (earned from The Fragmented at the end of the Isleweaver spiral) for Oraxia’s main and Component Blueprints at Dominus Thrax or Acrithis in the Dormizone in their “Exchange Scuttler Husks” store.
- Dominus Thrax will leave your Dormizone when Operation: Eight Claw ends, at which point Acrithis will remain as the permanent Scuttler Husks vendor.
- Purchase from the in-game Market individually or as part of the Oraxia Bundle for Platinum.
Oraxia’s Prex Card
A story straight out of Duviri, of course Oraxia has a Prex Card! I’m sure if you search Scholar’s Landing in the Isleweaver node you’ll be able to find it eventually. It’s a miracle it isn’t covered in cobwebs…
Maximum Loadout Slot Increase:
With the release of Oraxia, the maximum number of purchasable Loadout Slots has been increased from 29 to 30.
NEW WEAPONS
New Incarnon Heavy Scythe: Thalys
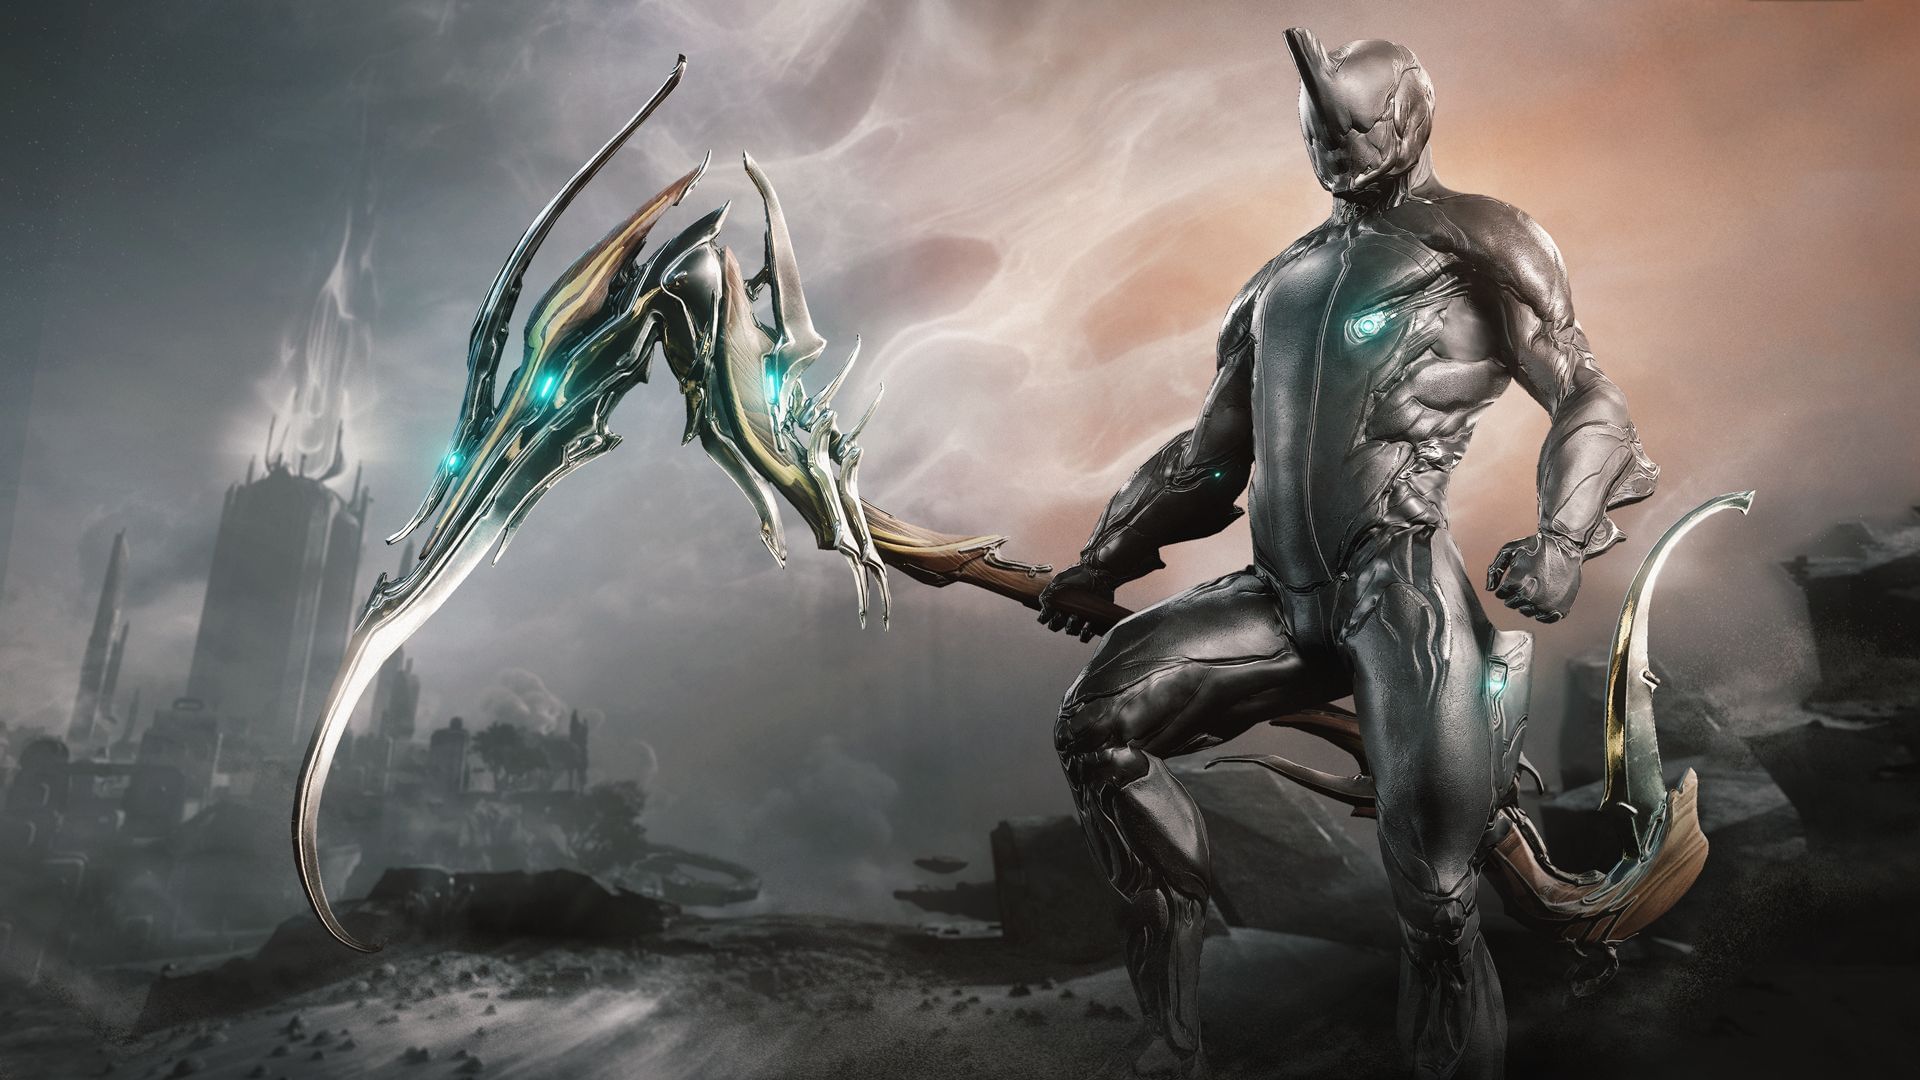 New Incarnon Heavy Scythe: Thalys (Image via Digital Extremes)
The Thalys played a ceremonial role in the Zariman harvest festival, and was intended to reap the first fruits of Tau. Now twisted from this purpose, it plants Void shards in enemy flesh instead. Each new seed planted causes existing shards to inflict damage on their hosts.
Incarnon Evolutions
Evolution I Perk: Incarnon Form
Evolution II Perks:
- Dreadful Reach: On Weapon Status Effect: +0.01 Range for 8 seconds. Stacks 20x
- Whirling Flurry: +20% Attack Speed
- Raging Drift: +80% Attack Speed while sliding. +20% Slide
Evolution III Perks:
- Nimble Scythe: For each enemy hit by Slide Attack, gain +5 Combo Count
- Echoes of Rage: +1 Combo Count on Shard Damage
- Adept Reflexes: +20 Initial Combo
Evolution IV Perks:
- Swift Transmute: Reach 3x Combo and Heavy Attack to activate Incarnon Form
- Vaulting Leap: +100% Jump and Double Jump Height
- Devastating Mercy: Ground Finishers knock enemies down in 6m radius
Evolution V Perks:
- Explosive Growth: Shards grow when a new shard is created, up to 3 times.
- Fully grown shards erupt out of the embedded enemy, dealing x2 damage and impaling them on the spot
- Chain Shatter: Heavy attacks detonate shards. Shards caught within the blast radius will also detonate
- Void Splinters: Shard duration is increased to 30s. Shards become weak spots that have +100% Critical Chance when damaged. Shard damage is reduced by -50%
How to Acquire Thalys
- Trade Scuttler Husks (earned from The Fragmented at the end of the Isleweaver spiral) for Thalys’ Blueprint at Dominus Thrax or Acrithis in the Dormizone in their “Exchange Scuttler Husks” store.
- Dominus Thrax will leave your Dormizone when Operation: Eight Claw ends, at which point Acrithis will remain as the permanent Scuttler Husks vendor.
New Whip Melee: Spinnerex
Each lash of Oraxia’s whip injects its victim with a dose of deadly toxin. Upon death, afflicted enemies have a chance to burst, damaging nearby enemies and spreading the poison.
Unique Trait: On death, enemies have a 10% chance to burst for each stack of Toxin Status Effect applied to them, spreading Toxin Damage.
How to Acquire Spinnerex
- Spinnerex’s main Blueprint and Component Blueprints can be acquired via the Isleweaver drop tables, requiring players to defeat The Fragmented to receive drops.
- Trade Scuttler Husks (earned from The Fragmented at the end of the Isleweaver spiral) for Spinnerex’s main and Component Blueprints at Dominus Thrax or Acrithis in the Dormizone in their “Exchange Scuttler Husks” store.
- Dominus Thrax will leave your Dormizone when Operation: Eight Claw ends, at which point Acrithis will remain as the permanent Scuttler Husks vendor.
- Purchase from the in-game Market individually or as part of the Oraxia Bundle for Platinum.
New Secondary: Scyotid
Go on the hunt with Oraxia’s signature secondary. Fling a volley of toxin-laced barbs, or drop a cluster snare that scatters on impact, seizing nearby enemies and dragging them together.
Unique Trait: Alternate Fire lobs a webbed snare that damages, paralyzes, and groups up to 8 enemies within 10m. The number of enemies is multiplied with Multishot.
How to Acquire Scyotid
- Scyotid’s main Blueprint and Component Blueprints can be acquired via the Isleweaver drop tables, requiring players to defeat The Fragmented to receive drops.
- Trade Scuttler Husks (earned from The Fragmented at the end of the Isleweaver spiral) for Scyotid’s main and Component Blueprints at Dominus Thrax or Acrithis in the Dormizone in their “Exchange Scuttler Husks” store.
- Dominus Thrax will leave your Dormizone when Operation: Eight Claw ends, at which point Acrithis will remain as the permanent Scuttler Husks vendor.
- Purchase from the in-game Market individually or as part of the Oraxia Bundle for Platinum.
TENNOGEN ISLEWEAVER
The latest batch of TennoGen is here, created by Warframe community artists!
 Octavia Netrahymn Skin & Alt Helmet
 An Entrati-themed skin for Octavia, designed by blazingcobalt.
 Hildryn Sarcostema Skin & Alt Helmet
An Infested-themed skin for Hildryn, designed by Ventralhound.
Eternalia Tower Oculus
An Entrati-themed Operator & Drifter Oculus, designed by Ventralhound.
 Arcosolium Arca Plasmor Skin
An Entrati-themed Arca Plasmor Skin, designed by Apollo Phoenix.
Stygean Oculus
An Entrati-themed Operator & Drifter Oculus, designed by Theriondrek & Vhynnz.
MARKET ADDITIONS
 The Citrine Aphrodita Collection (Image via Digital Extremes)
Citrine Aphrodita Collection
Light the flame of eternal love with Citrine Aphrodita. The Citrine Aphrodita Collection contains the following items, which can all be purchased separately:
Citrine Aphrodita Skin
Embrace the eternal bond between love and war with Citrine Aphrodita. There are no roses without thorns.
The skin also features deluxe VFX for her Preserving Shell and Prismatic Gem abilities.
Rubillon Heavy Scythe Skin
Reap enemies and steal hearts as you sweep through the battlefield with this Citrine Aphrodita’s signature heavy scythe skin.
Corazon Syandana
Delicate blooms framed by vicious thorns warn: beauty can still be deadly. Citrine Aphrodita’s signature syandana.
Erato Signa
Citrine Aphrodita inspires epics of undying devotion with this graceful signature Signa.
Didyma Ephemera
Leave lingering sparks in the hearts of all you encounter with Citrine Aphrodita’s signature ephemera.
Oraxia Bundle
Stalk your prey through the floating islands of Duviri with the new Oraxia Bundle! It contains the following items, which can all be purchased separately:
- Oraxia
- Oraxia Chelicera Helmet: Bare your fangs and strike fear into the hearts of your prey with this alternate helmet for Oraxia.
The blueprint for this helmet will be added to the Nightwave Cred Store with a future Nora’s Mix Volume.
- Scyotid (Secondary): Go on the hunt with Oraxia’s signature secondary. Fling a volley of toxin-laced barbs, or drop a cluster snare that scatters on impact, seizing nearby enemies and dragging them together.
- Spinnerex (Whip Melee): Each lash of Oraxia’s whip injects its victim with a dose of deadly toxin. Upon death, afflicted enemies have a chance to burst, damaging nearby enemies and spreading the poison.
- Arachna Armor: The chitinous spines of Oraxia’s armor lend a menacing aura to any Warframe. Includes the Arachna Chest, Leg and Arm Armor.
- Zygiella Ephemera: Surround yourself with the growing dread of Oraxia’s presence.
- Scuttler Domestik Drone: Oraxia’s creeping crawlers are pleased to make the Orbiter their hunting ground.
- Gift Bonus: Gift the Bundle to another player and receive the Scuttler Domestik Drone in return.
1999 Round Table Salon Pack
Everybody will know your name with this assortment of looks for the Operator and Drifter, featuring familiar hairstyles from the regulars of the Round Table Pub. The 1999 Round Table Salon Pack contains the following hairstyles, which can all be purchased separately.
Flare’s Hairstyle
Blow their minds with Flare’s signature hairstyle.
Minerva’s Hairstyle
Stay stylish even during the worst of international incidents.
Velimir’s Hairstyle
Casual. Cool. Velimir's signature hairstyle is no muss, no fuss.
Kaya’s Hairstyle
The messy bun of a genius with far more important things to worry about.
VALKYR REWORK
A berserker’s fury fills the air. Corpus, Grineer, Infested: torn pare by pare. Intrepid claws, raw and wild, writhing countless foes, until naught that’s left is the silence following their deathly throes. This is Valkyr’s rework, and it's here now!
Valkyr’s rework focuses on her core identity: the rage of a berserker. She’s receiving a top-to-bottom ability refresh, including an updated Passive that leans into a new mechanic: Rage. With this, we intend to capture the essence of reckless commitment. No breaks allowed.
To assist players in revisiting their Valkyr builds following these changes, an Inbox message containing 1 Forma (built) will be sent to all players with Isleweaver’s release!
Valkyr Stat Changes
Firstly, Valkyr’s base Health and Armor stats are being increased to provide her with over double the effective Health points. The stats below are at base value.
- Valkyr Health: 650 from 270
- Valkyr Armor: 855 from 630
- Valkyr Prime Health: 650 from 270
- Valkyr Prime Armor: 1000 from 735
Passive
Valkyr accumulates Rage when killing enemies, increasing her Melee Damage up to 300%. She consumes her Rage (if above 150% in the Rage meter) to prevent death and become invulnerable briefly.
- Gain Rage on Melee Kill and Melee Hit. Gain up to 300% Melee Damage based on real-time (i.e., no ‘snapshotting’) Rage amount.
- Kills grant a small amount of Rage.
- Assists build Rage—i.e., if Valkyr has Melee struck an enemy, but the kill is secured by another player, Valkyr will earn Rage.
- Finisher Kills and Mercy Kills grant a larger amount of Rage.
- Melee hits grant the least amount of Rage, but can be triggered multiple times per enemy.
- Rage stops decaying briefly whenever you gain Rage.
- Rage % slowly decays over time without Rage generation.
- Consumes all Rage when dealt lethal damage if the Rage meter is at 150% or above, preventing death and giving Valkyr 5 seconds of invulnerability.
- Death prevention has no cooldown; simply return to above 150% in the Rage meter to be able to prevent death again!
Rip Line
Rip Line has received adjustments to better accommodate playstyles that seek fast-paced traversal options, alongside increased flexibility in ability cancellation and further enemy grouping capabilities.
- Rip Line no longer cancels until Valkyr reaches the end of the line.
- Rip Line’s speed and ease-of-use have been updated, with the goal of providing a smoother experience.
- Double Jump usage is reset upon using Rip Line.
- Rip Line can be cancelled by jumping (or pressing melee) during use.
- Jumping during Rip Line adds a small, temporary momentum boost to the player’s movement mid-air.
- Rip Line’s cast when targeting an enemy will pull Valkyr towards that enemy and group enemies within a 9m radius around her upon reaching her target.
- Valkyr will automatically use a Melee attack when arriving at her target.
- The radius for Rip Line’s grouping scales with Ability Range.
- Updated Rip Line’s cast and impact SFX.
Augment
- Swing Line: Rip Lines has no Energy cost while Airborne. +20% Parkour Velocity.
Warcry
Warcry is receiving only minor adjustments, as the ability already fits the bill in her reworked kit. However, Warcry will now be able to buff allies who lose her Warcry buff, alongside additional quality of life tuning!
- Warcry can now be recast.
- Warcry’s base duration increased to 20 seconds from 15 seconds.
- Ability effects spread to allies within Affinity Range (50m, previously 25m)
- Players can re-acquire Warcry’s effects when re-entering Valkyr’s Affinity Range. If you die or get nullified, you can return to Valkyr to refresh Warcry!
- Warcry no longer slows enemies—it’s been moved to Paralysis!
- Warcry has received a new casting animation and updated visual effects.
- Warcry can now be cast while moving.
Paralysis
Paralysis now brings additional functionality to double down on the ability to weaken your foes, while reconfiguring it from costing Shields to Energy.
- Enemies struck by Paralysis receive a base 50% Melee Damage Vulnerability.
- Melee Damage Vulnerability scales with Ability Strength.
- Enemies and enemy health bars will receive VFX to indicate their vulnerability when the player actively uses any Melee weapon.
- Enemies struck by Paralysis are slowed by a base 30%.
- The slow scales with Ability Strength.
- Shield cost has been removed. Casting Paralysis now costs 25 Energy.
- Since there’s no Shield cost anymore, a base 400 Impact Damage was added to compensate.
- Paralysis has been updated with an upper-body animation to ensure movement isn’t interrupted when casting.
- Paralysis’s VFX was updated to appear radial rather than conal.
- Paralysis’s previous line of sight check has been updated to our modern version to improve hit-detection reliability.
Augments:
- Prolonged Paralysis: Enemies will now be ragdolled when grouped up via the Augment.
- This will fix a long-standing issue where enemies would not be pulled while afflicted with Status Effect reaction animations (e.g. Heat or Electric Status Effects).
Hysteria
The staple of her kit, Hysteria, pulls together the fantasy of her berserker theme. Now, combined with her new Passive, Hysteria will utilize her Rage to deliver hysterical destruction to any foe in your path.
- Hysteria’s Invulnerability has been removed, as Valkyr now triggers invulnerability through her Passive.
- With this change, the Self-Reflection damage part of Hysteria has been completely removed. In other words, you can no longer die specifically from deactivating Hysteria while enemies are nearby.
- Armor gained from Warcry is increased by 3x during Hysteria for Valkyr.
- Currently, Valkyr has one of the highest Armor stats, with room to acquire much more, but that Armor became meaningless with Hysteria’s invulnerability. Here, we aim to amplify Valkyr’s Armor capabilities, combined with her death prevention while above 50% of the Rage meter and Life Steal improvements.
- Valkyr is immune to Status Effects while Hysteria is active.
- Energy Drain caps at 5 Energy per second instead of 15.
- Healing from Hysteria’s Life Steal is now 100 Health per hit.
- Health gained scales with Ability Strength.
- Updated Hysteria’s SFX.
Valkyr’s Talons/Hysteria Melee Stance has received various adjustments to accommodate improved mobility, damage and forced Status Effects on her attacks during Hysteria.
- Combo attacks and animations have been updated to remove sudden stops, ensuring mobility is maintained while attacking (e.g., the Fervor Combo no longer stops player movement on the 3rd and 4th hits).
- Guaranteed Slash Status Effects have been added to several attacks in her Combos (excluding her Slide Attack).
- The Combos receiving Slash Status Effects during certain attacks are:
- Fervor (Neutral Combo)
- Rage (Forward Combo)
- Delirium (Neutral Block Combo)
- Rise From Ashes (Heavy Attack Combo)
- Several Combos have received increased Combo Counter gain on attacks:
- Fervor (Neutral Combo)
- Old: 1/1/1/1/1/1
- New: 1/1/2/2/2/3
- Delirium (Neutral Block Combo)
- Old: 1/1/1/1
- New: 1/1/2/2
- Rage (Forward Combo)
- Old: 1/1/1/1
- New: 2/3/3/3
- Madness (Forward Blocking Combo)
- Old: 1/1/1/1/1/1
- New: 2/2/2/2/3/3
- Several damage multipliers in her Combos increased up to 300%.
- Hysteria’s attacks received an increased base Attack Range to 2.15m from 1.7m.
- Hysteria IPS is now only Slash (75%) and Puncture (25%)—Impact damage and weighting have been removed entirely.
- Impact felt less useful in Hysteria’s damage distribution, as our goal was to emphasize the essence of Valkyr’s damage-dealing destructive capabilities.
Augments:
- Enraged: Damage and Critical Chance are increased to 350% from 200%.
- Hysterical Assault: Attack with Valkyr’s Talons to leap onto targeted enemies up to 50m away. Gain +50% Parkour Velocity and +50% Sprint Speed for 5s.
NEW WARFRAME AUGMENT MODS
New Augment Mods for Kullervo, Citrine, Caliban, and Jade are available to acquire from the Faction Syndicates!
Stats below shown at Max Rank.
Volatile Recompense (Kullervo)
Recompense Augment: Daggers whirl in a ring around Kullervo for 25 seconds, slashing nearby foes and dealing Blast Damage and Status Effect before returning to the ring.
Available in New Loka and Steel Meridian offerings.
Prismatic Companion (Citrine)
Prismatic Gem Augment: The gem now attaches to your free-moving companion. Passive: +50% Prismatic Gem Duration.
Available in Red Veil and Steel Meridian offerings.
Razor Mortar (Caliban)
Razor Gyre Augment: Enemies hit with Razor Gyre are grouped together. Ortholysts summoned by Lethal Progeny launch coordinated strikes upon grouped enemies with 70% Electricity Damage and Fire Rate for 6 seconds.
Available in Cephalon Suda and Perrin Sequence offerings.
Jade's Judgment (Jade)
Light's Judgment Augment: Enemies damaged by Jade’s light well have a 5% chance per hit to spawn a Jade Light above them, damaging them for 3 seconds.
Available in Arbiters of Hexis and Red Veil offerings.
ADDITIONS
 New Baro Ware: Void Surplus (Image via Digital Extremes)
New Baro Ware: Void Surplus
Baro Ki’Teer arrives with an enigmatic coffer, the contents of which lay in perpetual mystery — until unlocked. Crack open this Void Surplus box and see what rewards await you, Tenno.
Beginning with Baro Ki’Teer’s first post-Isleweaver visit on June 27th, Ki’Teer has added a permanent new offering for your consideration: Void Surplus. Available to purchase once per visit for 50,000 Credits, this Void Surplus will reveal an assortment of Boosters, upgrades, jackpots, and a unique Signa to acquire.
Drop Table, with drop chance percentage attached to each item.
- 2 Built Forma: 10.00%
- 10 Aya: 10.00%
- 1 Orokin Catalyst Blueprint: 8.00%
- 1 Orokin Reactor Blueprint: 8.00%
- 1 Exilus Warframe Adapter: 8.00%
- 1 Exilus Weapon Adapter: 8.00%
- 24-Hour Credit Booster: 7.00%
- 24-Hour Resource Booster: 7.00%
- 24-Hour Resource Drop Chance Booster: 7.00%.
- 24-Hour Affinity Booster: 7.00%
- 24-Hour Mod Drop Chance Booster: 7.00%
- 10 Universal Medallions: 4.00%
- 1 Built Omni Forma: 2.50%
- 1,000 Ducats: 2.00%
- 15,000 Endo: 2.00%
- 35,000 Kuva: 2.00%
- 1 Legendary Core: 0.50%
Additionally, players will have the chance to earn a new cosmetic: the Ki’Teer Nobilis Signa! This Signa is a Ki'Teer original, the crowning glory of any collection.
The Ki’Teer Nobilis Signa has a low chance to be acquired when opening a Void Surplus, and is rewarded in addition to whatever goodies you unlocked. The odds of acquiring the Signa grow with each Void Surplus opened! The odds of acquiring the Ki’Teer Nobilis Signa are:
- 5% drop chance + 4% drop chance increase per opened Void Surplus.
Like all other cosmetics, this Signa can only be obtained once.
To recap, Tenno can purchase 1 Void Surplus per visit, costing 50,000 Credits. The Ki’Teer Nobilis Signa is a possible additional drop to the usual items, with the odds of acquiring it growing with each box!
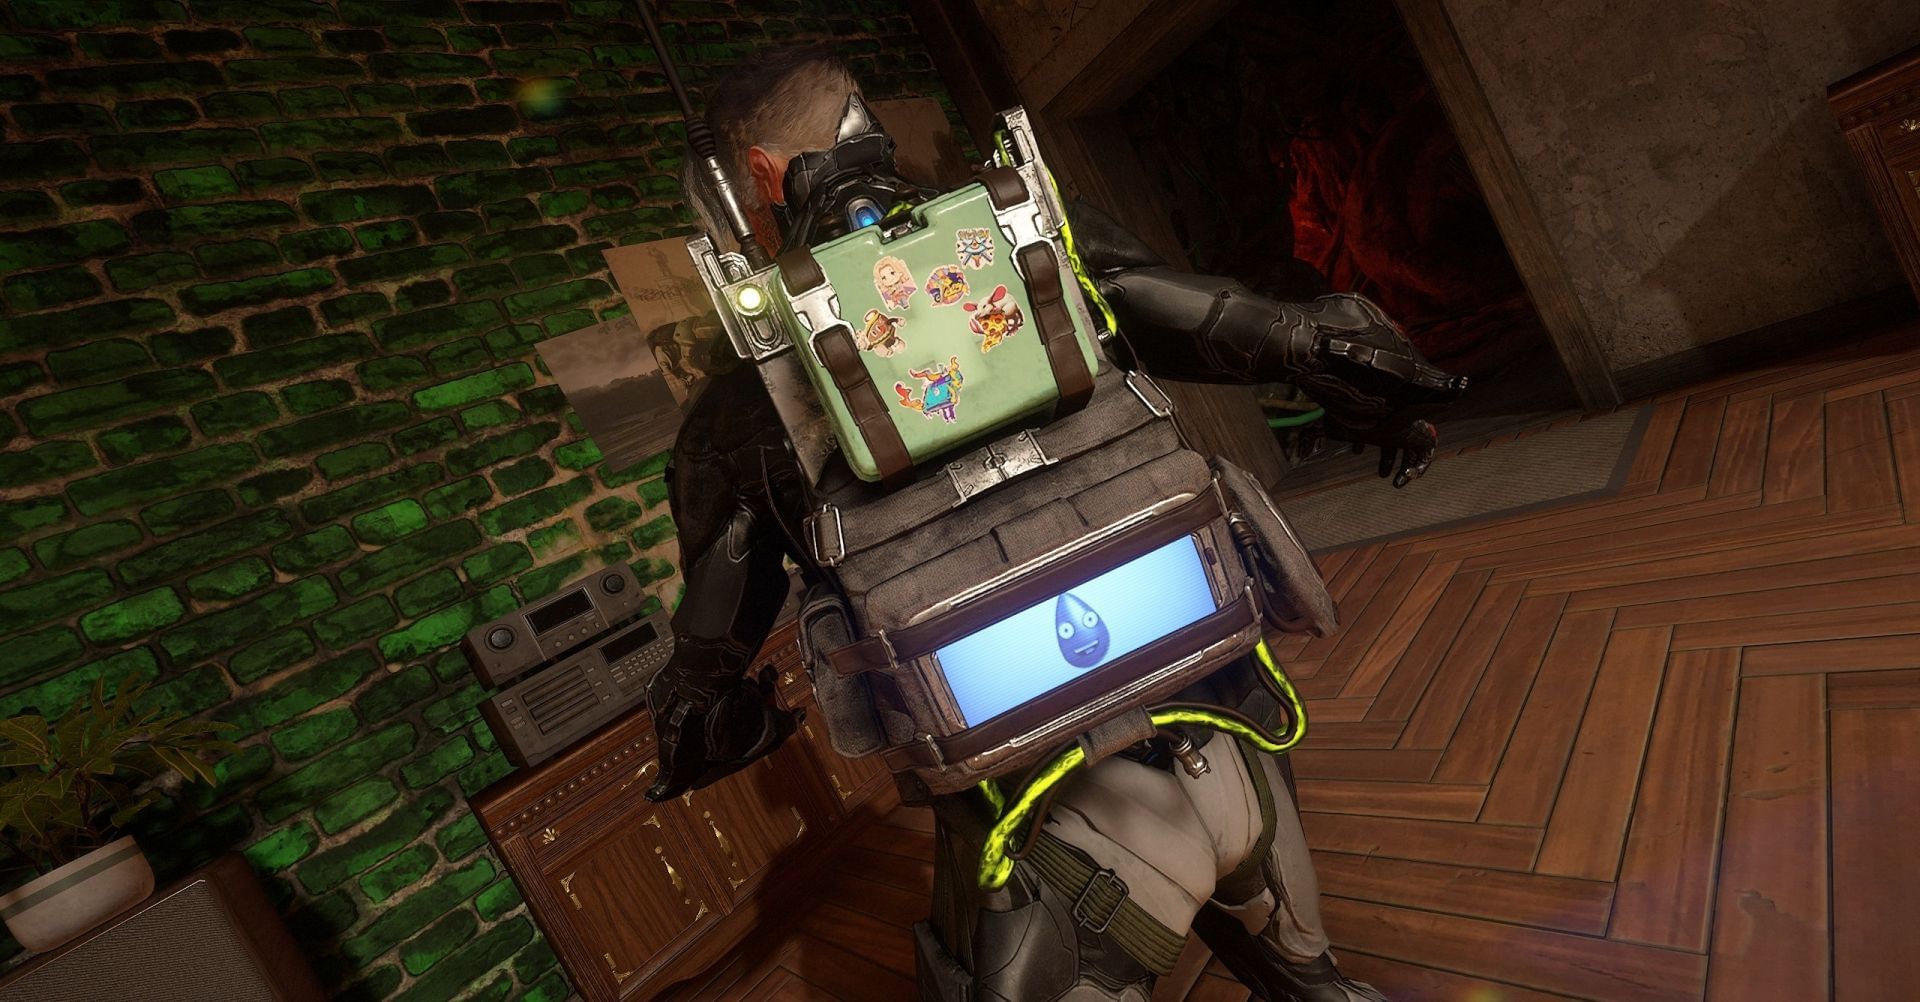 K.O.L. Drippy-Assisted Tactical Syandana (Image via Digital Extremes)
New Varzia Ware: K.O.L. Drippy-Assisted Tactical Syandana
We’ve added the K.O.L. Drippy-Assisted Tactical Syandana to Varzia’s wares for Regal Aya! Be prepared no matter where you go with everything you need for the long haul, including Drippy, the K.O.L. virtual assistant.
"No need for waterworks, Drippy is here to help!"
With the popularity of the limited TennoCon 2024 Syandana, we wanted to give players access to a Syandana that hits that same tactical backpack style but with a new look! This Syandana is a permanent addition to Varzia’s wares and can be purchased at any time.
Since this is a reimagining of the TennoCon 2024 Syandana, players who had purchased the TennoCon 2024 Digital Pack will be receiving the K.O.L. Drippy-Assisted Tactical Syandana for free when they login.
The Peely Pix featured on the Syandana are by community artists Nelosart, bugbreach, Darika, Freyaloi and DasterCreations!
General Additions
- Added the Temple and the Rippers Tour Poster to Flare’s Memorabilia for Beating Heartstrings. Grace your walls with this poster promoting Temple and the Ripper’s fateful 1999 tour.
- Added In Action Glyphs to the following Vendors:
- Kullervo In Action Glyph to “Kullervo’s Archive” wares at Acrithis in the Dormizone (or Duviri)
- Citrine In Action Glyph to “Unearth Citrine” wares at Otak in the Necralisk
- Khora In Action Glyph to Cephalon Simaris’ Offerings (in any Relay)
- Added Kullervo’s Hold Scene to Acrithis’ “Kullervo’s Archive” wares in the Dormizone (or Duviri) for Kullervo’s Bane.
NEW PLAYER EXPERIENCE CHANGES
Junction Rework
Junctions are vital tools to guide players through the Star Chart, and ensure they learn some of Warframe’s fundamentals. Since their introduction with Specters of the Rail in 2016, we’ve adjusted their Specters, rewards, and tasks over various updates. The Isleweaver update brings a UI refresh and other quality of life changes.
Junction UI Refresh
Junctions offer much information, but players cannot interact with the UI itself. Clicking on a Junction would enter a player into the Junction itself, meaning there was little opportunity for on-hover tooltips or additional information to be provided to players.
 Junction rewards rework (Image via Digital Extremes)
Now, selecting a Junction will open a new Junction Screen where players can view all tasks and rewards, with a separate button press required to enter the Junction itself. Junctions have received these additional UI changes:
- Players can no longer enter Junctions when all tasks are not completed.
- While players would not be able to fight the Specter, entering Junctions early only confused players; now, you can only enter when you’re ready for the Specter showdown.
- This change shipped with Techrot Encore, but we’re including here for a wider view of all Junction changes.
- Improved on-hover tooltips for tasks and rewards and overall more space to display important information to players.
- Interacting with a Completed Junction will now take you to the connecting planet. Players can still open the Junction screen with the input shown in the UI.
- Incomplete Junctions now display how many tasks remain in the Star Chart
Junction Reward + Task Changes
Alongside the UI refresh, we’ve revisited many Junction tasks to close gaps in player teachings — most importantly, we have changed how rewards are received from Junctions.
Previously, players would have to defeat the Junction’s Specter to receive all of the rewards. Now, each Junction Task has been assigned a reward that will be given upon Task completion, in addition to the goodies players earn after defeating the Specter. Players can complete Junction Tasks before the Junction is available to them, but will not be able to claim the reward until the Junction is accessible.
Players who have already completed certain Junctions will receive the following rewards in their Inbox on login:
- Venus Junction: Fully Built Furis (including the Weapon Slot)
- Mercury Junction: Warframe Slot
- Jupiter, Neptune, and Pluto Junctions: Endo
- Eris Junction: Unlock Arbitrations
Main Junction Path:
The Junction path has been adjusted with linear progression in mind. We’re building on the Star Chart changes from Techrot Encore (reduction of nodes to complete and de-prioritization of the Europa and Ceres Junctions) to help guide players towards completing the Main Story. Tasks have been reworked to help explain key parts of the Warframe experience — ex: equipping and upgrading Mods, and using the Foundry.
Venus Junction
Junction Tasks:
- Complete Quest: Vor's Prize
- Reward: Dreamer’s Bond (unranked)
- NEW: Equip the Dreamer's Bond Mod
- Reward: Deep Freeze (unranked)
- Auras are essential to increasing Mod Capacity, so we want to reinforce this mechanic early on.
- CHANGED: Upgrade Dreamer's Bond Mod (previously was any Mod)
- Reward: Taxon Blueprint
- Instead of using Endo on any Mod, we’re directing them to invest it in one that will serve them well at the start of their journey.
- NEW: Start building a Taxon Sentinel in the Foundry*
- Reward: Orokin Reactor
- Prioritizing Sentinels gives players access to Vacuum (important for resource gathering), as well as some extra DPS in their early missions! This task also reinforces Foundry usage.
Junction Completion Rewards:
- Furis (was: Furis Blueprint)
- 15,000 Credits (was: 5000 Credits)
* We have also made changes to Taxon’s crafting costs, which we cover in the “Other Junction-Related Changes” section!
Mercury Junction
Junction Tasks:
- Complete Quest: Vox Solaris
- Reward: Incubator Power Core
- NEW: Purchase a Rhino Blueprint from the Market for Credits
- Reward: Fast Deflection (unranked)
- This teaches players the free path to obtain Warframes via the Market — ie. crafting!
- Defeat Jackal at Fossa (Venus)
- Reward: North Wind (unranked)
- NEW: Start building a Rhino Component* in the Foundry
- Reward: 1 Warframe Slot
- This encourages players to start using their Foundry.
Removed Task:
- Complete 6 waves of Defense at Tessera on Venus in a single mission.
Junction Completion Rewards:
- Boltor
- 20,000 Credits (was: 10,000 Credits)
- Quests Unlocked:
- Once Awake
- Howl of the Kubrow
*We have also made changes to Rhino’s crafting costs, which we cover in the “Other Junction-Related Changes” section!
Mars Junction
Junction Tasks:
- Complete Quest: Once Awake
- Reward: Void Relic Segment
- NEW: Visit the Side Quest section of the Codex in the Orbiter
- Reward: 25 Codex Scanners
- The Codex is vital to help guide players through the main story, so this task makes them more familiar with it.
- NEW: Complete a mission with the Boltor Primary Weapon equipped
- Reward: Lith C7 Relic
- This task guides players to use newly-acquired equipment.
- NEW: Purchase an MK1 Weapon from the Market
- Reward: Streamline (unranked)
- Again, this reinforces the free path to new weapons — and helps them expand their Arsenal!
Removed Task:
- Collect 250 Rubedo in missions
Junction Completion Rewards:
- Fragor
- 25,000 Credits (was: 10,000 Credits)
- Quests Unlocked:
- The Archwing
- Heart of Deimos
Jupiter Junction
Junction Tasks:
- Complete Quest: Heart of Deimos
- Reward: Rubedo-Lined Barrel (unranked)
- NEW: Get 1 Kill while Wall Dashing or Wall Latching
- Reward: Clashing Forest (unranked)
- NEW: Complete the Advanced Movement Tutorial in the Codex
- Reward: 500 Endo
- NEW: Upgrade a Redirection Mod to Rank 5
- Reward: Crushing Ruin (Unranked)
These revised tasks guide players to master their Parkour mechanics, as the Gas City tileset is especially parkour-heavy.
Junction Completion Rewards:
- Amphis Blueprint
- 30,000 Credits
Saturn Junction
Junction Tasks:
- Complete Quest: The Archwing
- Reward: Void Relic Segment
- NEW: Equip a Codex Scanner to the gear wheel
- Reward: Cutting Edge (unranked)
- This task teaches players where to find their Gear Wheel and how to equip items onto it.
- NEW: Fully scan the same enemy type to add it to your Codex.
- Reward: 3 Neural Sensors
- This task teaches players about the enemy section of their Codex, and helps them learn about scanning in preparation for Natah.
- NEW: Dissolve 5 Mods
- Reward: 500 Rubedo
- This teaches players to earn Endo from their extra Mods!
Removed Task:
- Defeat Alad V at Themisto (Jupiter)
- Players already have to complete this Node to access the Junction, so we’ve swapped this task for something more instructional.
Junction Completion Rewards:
- Penta Blueprint
- 40,000 Credits
- Quest unlocked: The Deadlock Protocol
Uranus Junction
Junction Tasks:
- Defeat Sargas Ruk at Tethys (Saturn)
- Reward: Chroma Neuroptics Blueprint
- NEW: Kill 10 enemies with Heavy Melee attacks
- Reward: Focus Energy (Unranked)
- Heavy Melee attacks are important to learn as the game’s difficulty increases!
- NEW: Complete 20 minutes of Survival at Titan (Saturn)
- Reward: 10 Orokin Cells
- Endless mission reward rotations may not be clear to players, so this task aims to teach them that staying longer often gets them better loot!
- NEW: Transmute a Mod
- Reward: 20,000 Credits
- Much like earning Endo from extra Mods, this teaches them about Transmutation as a way to possibly earn new Mods.
Removed Tasks:
- Open 1 Meso Void Relic
- We moved tasks teaching players how to open Void Relics to Optional Junctions (see the section below), as Relics are not critical for the main story path.
- Learn how to perform Synthesis
- This task was moved to the Europa Junction as it is not critical to the main story path.
Junction Completion Rewards:
- Lecta Blueprint
- 40,000 Credits
- Quest unlocked: The Duviri Paradox
Players also receive a taunting inbox from Tyl Regor once they unlock the Uranus Junction to direct them towards his node, and introduce him as a character.
Neptune Junction
Junction Tasks:
- Complete Quest: Natah
- Reward: 1,000 Endo
- Defeat Tyl Regor at Titania (Uranus)
- Reward: Chroma Chassis Blueprint
- Complete a mission on Uranus with only your Melee Weapon equipped
- Reward: 3 Tellurium
- NEW: Complete a Rescue Mission at Caliban (Uranus)
- Reward: 5 Detonite Injector
These tasks are relatively unchanged, as they encourage exploration of the Grineer Sealab tileset in preparation for Natah and The Second Dream.
Junction Completion Rewards:
- Gammacor Blueprint
- 80,000 Credits
- Quest unlocked: The Second Dream
Pluto Junction
Junction Tasks:
- Complete Quest: The Second Dream
- Reward: 2,500 Endo
- NEW: Defeat the Hyena Pack at Psamathe (Neptune)
- Reward: Chroma Systems Blueprint
- NEW: Equip the Archwing Launcher in the Gear Wheel
- Reward: 750 Endo
- As players start getting access to their Operator, they’ll eventually need to start investing in Open Landscapes. Archwing is a great quality of life for these missions!
- NEW: Play the same Invasion mission 3 times in support of a single Faction
- Reward: 10 Fieldron
- Invasions can be a great source of weapons and equipment for players, but their mechanics may not be entirely clear. This Junction helps to reinforce the expected loop!
Junction Completion Rewards:
- Drakgoon Blueprint
- 80,000 Credits
- Quest unlocked: The War Within
- The War Within was moved from the Sedna Junction due to the Junction path restructuring.
Eris Junction
Junction Tasks:
- NEW: Equip a Focus Lens
- Reward: Unlock Arbitrations
- Players earn their first Focus Lens from The Second Dream, so this task ensures they actually install it!
- CHANGED: Complete 6 waves of Defense at Stöfler (Lua) in a single mission (was: 3)
- Reward: Orokin Catalyst
- We extended this task to showcase the second stage of this Defense mission.
- NEW: Find a locked Orokin Vault at Phlegyas (Deimos)
- Reward: 1 Dragon Key Bundle
- Corrupted Mods are great for more advanced builds, so this teaches players how to find them! Players only need to find an Orokin Vault to complete this Task — Phlegyas isn’t required, but recommended for ease of searching.
- NEW: Complete Quest: The War Within
- Reward: 15 Carbides
Junction Completion Rewards:
- Mire Blueprint
- 100,000 Credits
- Quest unlocked: Patient Zero
Sedna Junction
The Sedna Junction has been moved from Pluto to Eris to reinforce linear progression for the Main Path.
Junction Tasks:
- Complete Quest: Rising Tide
- Reward: Zetki Apoc MK I
- NEW: Complete the Railjack mission Sover Strait (Earth Proxima)
- Reward: Vidar Plating MK I
- We want players to be familiar with Railjack in preparation for The New War. This task encourages them to dip their toe into this gameplay.
- CHANGED: Defeat 5 Vomvalysts on The Plains Of Eidolon (Earth)
- Reward: 25 Intact Sentient Cores
- This task previously required players to defeat 2 Sentients on Lua, but spawns could be inconsistent. Since Vomvalysts spawn aplenty in The Plains of Eidolon at night, this felt like an easier alternative that also teaches players about the Day/Night cycle in this Landscape.
- NEW: Defeat Ambulas at Hades (Pluto)
- Reward: 1,500 Cryotic
Junction Completion Rewards:
- Fang Blueprint
- 100,000 Credits
- Quest unlocked: Hidden Messages
Optional Junctions:
The following Junctions are “Optional” as they are not critical to the Main Story path. As such, we’ve reorganized their Tasks to focus on important content that isn’t essential for the journey to 1999 (and beyond), but are still vital for players to know about in their Warframe journey.
Phobos Junction
Junction Tasks:
- Refine a Void Relic at the console in the Orbiter
- Reward: 1,000 Salvage
- NEW: Open 3 Lith Void Relics
- Reward: Cipher Blueprint
- NEW: Get 10 enemies with Headshots
- Reward: Fast Hands (unranked)
- Visit Maroo's Bazaar on Mars
- Reward: Thief's Wit (unranked)
These revised tasks teach players about Void Relics.
Junction Completion Rewards:
- Kraken blueprint
- 20,000 Credits
- Quest unlocked: Stolen Dreams
Note: the Orokin Catalyst from the Phobos Junction has been moved to the Eris Junction, since this Junction is no longer required for main story progress.
Ceres Junction
Junction Tasks:
- NEW: Complete Maroo's Weekly Ayatan Treasure Hunt
- Reward: Ayatan Amber Star
- NEW: Fill an Ayatan Sculpture with Ayatan Stars
- Reward: Fever Strike (unranked)
- NEW: Trade an Ayatan Sculpture in with Maroo for Endo
- Reward: Swirling Tiger (unranked)
- NEW: Pledge to a Syndicate
- Reward: 1 Universal Medallion
These revised tasks teach players about Ayatan Sculptures and Syndicates.
Removed Tasks:
- Open 3 Lith Void Relics
- This was moved to the Phobos Junction to keep all Void Relic tasks in the same spot.
- Defeat The Sergeant at Iliad (Phobos)
Junction Completion Rewards:
- Vulkar blueprint
- 20,000 Credits
Europa Junction
Junction Tasks:
- CHANGED: Learn how to perform Synthesis from Cephalon Simaris
- Reward: Physique (unranked)
- (Moved from the Uranus Junction)
- NEW: Visit a Dojo
- Reward: 15,000 Credits
- Clans are important sources of Research, so this task encourages players to learn more about them without directly requiring players to join one.
- NEW: Start building 1 Forma in the Foundry
- Reward: 10,000 Credits
- NEW: Complete a Nightmare mission
- Reward: Animal Instinct (unranked)
Removed Tasks:
- Complete Exterminate Mission at Teshub (Void)
- Due to the restructuring of the Junction path, this Node requires the Phobos Junction to access it.
Junction Completion Rewards:
- Cestra blueprint
- 30,000 Credits
Other Junction-Related Changes
Arbitration Unlock Changes:
Arbitrations are now unlocked through Junction completion instead of completing all Star Chart nodes. Arbitrations are now unlocked upon completion of a Task in the Pluto > Eris Junction.
While the Star Chart node completion made sense for the initial launch of Arbitrations, the addition of Steel Path meant players unlocked content of varying difficulty from the same mechanic. Arbitrations are widely recommended for players to complete to prepare for the Steel Path, so we’re giving them access to it earlier.
Taxon Crafting Cost Changes:
Since players are now asked to build Taxon in the Venus Junction, we’ve made the following changes to a) make crafting Taxon easier, and b) allow players to gain access to their Sentinel sooner.
- Removed Polymer Bundle from the Taxon Blueprint.
- Reduced build time from 24 hours to 1 minute.
Rhino Crafting Cost Changes:
Rhino’s material requirements are being revamped to only require resources from Earth and Venus as building a Rhino Component is now a requirement for the early Junction tasks.
- Main Blueprint: 1 Neurode (was 1 Gallium)
- Neuroptics: 150 Alloy Plates, 1 Neurode (was 1 Morphics), 150 Polymer Bundle, 500 Rubedo
- Chassis: 450 Circuits (was 1 Morphics), 1000 Ferrite, 300 Rubedo
- Systems: 500 Ferrite, 250 Circuits, 100 Polymer Bundle, 400 Rubedo
- Was 1 Gallium, 1 Morphics, 500 Salvage, 600 Plastids
Captain Vor Rework
Captain Vor, master of the Janus Key, has received a rework. Since he is a new Tenno’s first introduction to Warframe bosses, our goal is to make his fight more dynamic without being too punishing for new players. This write-up is dedicated to the Normal Path version of his fight; he may have a few more tricks up his sleeve for those who focus.
To start off, he’s got a new fancy arena — when players enter the door, they’ll meet him face-to-face. In this new tile, players will see his new and reworked abilities in a better light:
- Electricity grenades: His nervos grenades now spawn actual arc spheres that deal electricity in a wide area.
- Electrical pylons: Vor uses the Janus key to summon a beam of electricity which will target players, similar to the mechanic seen in the Awakening Quest.
- Shield: Vor’s health is broken into four segments. Upon losing one segment of health, he’ll cloak himself in the familiar shield orb and spawn reinforcements to protect him.
- Teleport: Largely unchanged, but with some visual updates to indicate where he teleported to.
After losing half of his health (2 health segments), Vor will teleport deeper into his lair. Players will have to navigate tunnels armed with electrical traps to find him. These manifest as simple laser puzzles that players have to parkour through, and are designed to keep new players in mind. Hitting the lasers deals electrical damage, but players won’t be overly punished should they not traverse them perfectly.
Once you make it through the tunnel, Vor will be waiting on a series of platforms elevated over an electrified pool. The second half of the fight takes place here, where Vor will unleash a few extra tricks up his sleeve:
- Void Key Beam: This beam will swipe across the room, requiring players to jump to avoid it.
- Electrical Orbs: (on his final health state) Vor summons an electrical orb above the platform he’s standing on, which will zap anyone nearby. Players can shoot at these orbs to destroy them.
Steel Path Rewards:
We’ve added Arcanes to the end of mission rewards in the Vor fight on the Steel Path. Defeat him for a guaranteed Arcane from the following list
- Arcane Battery
- Arcane Power Ramp
- Arcane Blessing
- Arcane Steadfast
- Primary Obstruct
- Cascadia Flare
- Secondary Surge
- Melee Vortex
We also added new Accolade Glyphs for Tenno who display certain feats of strength in the Vor fight (wink wink nod nod). Designed by Community Artist Kedemel.
Quest Changes
Awakening Completion Reward Change
In April, we ran a New Player Gear Experiment for a small group of iOS players. This experiment sought to learn how providing new Tenno with additional starting gear might affect their journey through the Origin System. This experiment has concluded, and we are applying our learnings to All Platforms:
- All new players who complete the Awakening Quest for the first time will receive a built version of either the Paris or the Braton (whichever one they did not choose during the first stage of Awakening).
- The Alternate Primary Weapon will automatically be in the new player’s Arsenal upon completing Awakening.
Natah Starting Mission Changes
Natah is a player’s first real step into Warframe’s main quest line, but this entry point into the story can be abrupt and even confusing.
Previously, players would have to scan Oculysts on Uranus to trigger this Quest. Since this Quest is now automatically unlocked after The Archwing, that requirement is gone. Now, players will progress immediately to the “Scan the New Drones” mission on Gaia (Earth) step, with some added tutorialization for scanning:
- The Lotus will now tell players to equip their scanners before starting the mission.
- The Lotus will now instruct players how to scan Oculysts if some time has passed without scans.
We’ve added a few other transmissions to this mission with the goal of offering a little more narrative context, as well!
The New War (Railjack Sections)
Two of the main content requirements for The New War were Railjacks and Necramechs. We added loaner Necramechs in Techrot Encore since the Necramech segment didn’t require robust Necramech builds, but the Railjack segments can be difficult for players who haven’t invested in this system up until this point.
Since players can’t exit the Quest to beef up their Railjack, we have buffed the Railjack’s health, shields, and damage during these segments!
Archwing Launcher Acquisition
Missed Note from Techrot Encore: The Archwing Launcher has been added as a Quest Reward from The Archwing Quest.
- The Archwing Launcher Segment research in Clan Dojos was removed and resources were refunded.
In addition to this change, Isleweaver has streamlined the process to start using your Archwing Launcher in Open Landscape missions:
- Removed the Archwing Launcher Segment and Blueprint entirely.
- Players now receive the Archwing Launcher upon completing The Archwing Quest, meaning they’re ready to equip it to their Gear Wheel immediately once they’ve acquired their Archwing.
- Removed the Archwing Launcher Segment from the Market.
- For players who purchased the Archwing Launcher Segment for Platinum between Techrot Encore and Isleweaver’s release, we will be refunding your Purchase. We’ll update players once the script has been run.
The Rising Tide Quest Order Changes
Players now must complete The War Within before they can play The Rising Tide quest. This is due to a specific character only showing up in a cutscene once you’ve completed The War Within.
Other New Player Experience Changes:
- Players will no longer have to scan plants to earn their extracts.
- Now, plants like Moonlight Dragonlily and Ruk’s Claw will have a “Hold to Collect” context action to pick them up in-mission.
- Oxylus’ Botanist Precept has been changed to automatically pick any plants within 50m over 2s (at max rank).
- This also applies to the Silver Grove Quest, which requires players to collect certain plant resources to progress. The objective descriptions have been updated to specify “gathering” instead of “scanning”.
The scanning mechanic was overly complicated for new players, so this simplification should benefit Plant Extract gathering for Tenno across the board.
- Players can now visit Cetus without having completed the Saya’s Vigil Quest.
- This removes the requirement to play Saya’s Vigil to receive their Mote Amp from Onkko.
- Also removed mention of Saya’s Vigil from the Once Awake quest completion Inbox as it is no longer a Main Story quest.
- Added a slight delay (0.5 seconds) to the Bailiff’s charge attack.
- Removed the intro settings screen for new players.
- This was added with The Duviri Paradox, but is since outdated. We’re removing it so that players are encouraged to look at all available settings instead.
- Players who load into the game for the first time will now be presented with custom launcher music to improve the transition from launcher to the Awakening opening cinematic.
- The introductory Kuva Lich inbox message will now only be delivered once players meet all prerequisites to engage with Kuva Liches (i.e. have completed The War Within and Rising Tide quests, and are Mastery Rank 5).
- Previously this was sent only upon The War Within completion, as the other prerequisites were required to reach that Quest.
- Updated the pop-up for newly-acquired Railjack Components to indicate where they can be inspected.
- Now reads: Inspect this recovered component in a Dry Dock (Clan Dojo or Saturn/Pluto Relay) to discover its statistics.
QUALITY OF LIFE CHANGES
Dojo Changes & Additions
- Added a “Preview” toggle in Decoration Mode so players can see how the room will look when fully funded.
- Added a “Fund All Pending Decorations” option to the room console! No need to fund all 1600 decorations of a room individually.
- Only resources from the Clan Vault are used in the funding process.
- The Auto Contribute from Vault feature is unchanged.
- Dojo Rooms now have two additional decoration permissions that can be set per-room at Room Options consoles.
- Allow Unrestricted Decorating: Allows any selected Clan member to place and edit decorations in this room, regardless of their Clan role.
- This setting is only available for Clan members with the Dojo Decorator role.
- Lock Room Editing: Lock the room to prevent further decoration changes.
- This setting is only available for Warlords and the Founding Warlord.
- Added a new NPC Decoration type: Visitors
- Players can now invite 8 different Ostron and Solaris Visitors to join their Dojo. These characters use their existing animation sets and are immediately funded upon placement.
- Players must complete “Visitor Authorization” (research) for these NPCs in the Bash Lab to unlock them as a decoration.
- Ostron Relaxed (Seated)
- Ostron Explorer (Standing)
- Ostron Gatherer (Standing)
- Ostron Trader Woman (Standing)
- Solaris Rig Jockey (Standing)
- Solaris Rig Jockey (Seated)
- Solaris Foreman (Standing)
- Solaris Hazard Worker (Standing)
- To minimize cloning allegations (and performance concerns), only 4 of the same NPC can be placed in the same room.
- Tributa Statue changes:
- Tributa Statues can now be scaled up to a much larger size, which allows players to reduce their overall number needed to make Shadow Art designs.
- The available range when scaling text got changed to 0.2 to 16 (from 0.2 to 2). Scaling range of the physical decoration remains unchanged.
- For our Shadow Art lovers, this means the surface area from <OMEGA> text codes can now reach 64x the surface area!
- Players can now add line breaks.
- Increased the character limit from 30 to 60.
- Capped the number of Tributa Statue decorations to 1000 per Dojo to address performance concerns when large amounts of Tributa are placed.
- Those with existing Tributa are unaffected, but will not be able to place additional Tributa if they are over the cap.
- Improved performance issues caused by Tributa.
- Q&A and Region Chat are now accessible while in the Dojo.
- The “Hide Owned” toggle now applies to crafted items in the Research menus in the Dojo.
Dojo Fixes:
- Fixed disconnected ground textures in the Courtier’s Bliss Dojo room.
- Fixed searching “1999” in the Dojo Decoration screen not yielding any related results.
- Fixed Dojo room messages being restricted to one line.
- Fixed VFX from the “Fog Falling” atmospheric decoration appearing too dark.
KIM Changes & Additions
- Added 10 new conversations to each of the original Hex members (Arthur, Aoi, Eleanor, Amir, Quincy, and Lettie).
- These new conversations are available to players who have reached Loved or Best Friend status.
- Players now have the option to reset the Protoframes per “group” upon the 1999 Calendar New Year.
- When the 1999 Calendar resets, players will be presented the following options in their KIM window if they choose to Forget:
- Forget The Hex (Arthur, Aoi, Eleanor, Amir, Quincy, and Lettie)
- Forget The Roundtable (Flare, Kaya, Velimir & Minerva)
- Forget All
Captura Improvements
Captura Changes
- Added a Grid Lines (rule of thirds) toggle under the Camera settings!
- Changed the confirm button while editing camera setting on controllers to the right thumbstick due to the previous binding overlapping with Select Scene.
Captura Fixes
- Fixed unintentional text inputs in Captura’s Select Scene search bar when accessed from the Captura Gearwheel.
- Fixed Captura’s “Show UI In Screenshots” always hiding the player’s UI in screenshots, regardless of whether it’s toggled on or not.
- Fixed changing Gear Wheel items in the Arsenal in Captura opening the Quick Access wheel instead.
- Fixed removing the last camera or all camera positions instead advances time.
- Fixed being able to spawn enemies specifically via the Captura Quick Access wheel in scenes where enemies aren’t allowed to be spawned (e.g., The Necralisk).
- This restriction already existed with the original UI! However, the Quick Access Wheel was able to unintentionally bypass it.
- Fixed selecting the “Spawn Enemies” option from the Captura Quick Access Wheel immediately moving the cursor into the enemy search field.
- Fixed Depth of Field settings not working when used from the Captura Quick Access Wheel.
Misc. QOL Changes
- (Missed note from Yareli Prime) Corrupted Holokeys are a guaranteed reward from Void Storm missions — players will earn 1 Corrupted Holokey from Void Storms, and an extra for Void Storms in the Veil Proxima (2 total).
- Made several improvements to the Helminth Feed UI to better communicate how the resources are being contributed.
- The popup while hovering over a resource will now indicate what type of Secretion it is and how much of it will be fed. Also added a “select” button callout.
- Selected resources will now populate above the “Feed” button to show you what you have selected thus far.
- Hovering over the resource icons will also tell you the percentage of secretion that will be achieved after feeding it to Helminth.
- Incarnon Adapters available in the current Steel Path Circuit rotation are now available for Platinum Purchase in Cavalero’s store in the Chrysalith.
- Purchasing these Incarnons for Platinum will reward players with both the Adapter and the required resources to install it.
- Added Limbo’s Banish to the “Invert Tap/Hold Abilities” setting.
- You can now separately customize Charge reticle colors via the HUD Customization screen.
- We added this setting for Reload / Charge with Yareli Prime, but separated them out further after community feedback. Players can now customize Reload and Charge colors separately.
- Improved search term weighting so that item names have the highest priority — this is especially helpful for items whose names commonly appear in item descriptions, like Mag.
- Adversary weapons with an Elemental Vice installed now have an Elemental Vice icon in the Arsenal/Inventory and in the on-hover tooltip.
- Changed default aim sensitivity to mirror the values more commonly used by players on KBM and controller.
- Reduced default aim sensitivity values from 50% to 20%
- Reduced aim sensitivity range min value from 0.1 to 0.01
- These changes will not affect your custom sensitivity settings.
- Sorties now use the newly added Weapon class subcategories (Precision Rifle, Bow/Crossbow, etc) when indicating a specific Modifier.
- Added the ability to search for specific input bindings in the Customize Key Bindings options instead of having to browse through manually.
- The following settings have been grouped into corresponding sub-menus. Open the parent category to open these options:
- Controller Deadzone:
- Left Stick Deadzone
- Left Stick Axial Deadzone
- Left Stick Maximum Input Threshold
- Right Stick Deadzone
- Right Stick Axial Deadzone
- Right Stick Maximum Input Threshold
- Trigger Press Threshold (Controller)
- Trigger Release Threshold (Controller)
- Legacy Aim Deadzone
- Chat Visibility
- Show Region Chat
- Show Questions & Answers Chat
- Show Recruiting Chat
- Show Trade Chat
- Show Council Chat
- Damage Numbers
- Show Damage Numbers
- Compact Damage Numbers
- Damage Numbers Scale
- Damage Numbers Opacity
- Bold Damage Numbers
- Show Damage Numbers for Non-Player Allies
- Character Highlighting
- Enemy Highlighting
- Enemy Highlight Color
- Enemy Highlight Intensity
- Ally Highlights
- Self Highlight
- Ally Highlight Color
- Ally Highlight Intensity
- Players no longer need to equip the Sacred Vessel to their Gear Wheel in the Sands of Inaros Quest.
- The Upgrade Screen now displays your Endo count (instead of only appearing once you entered the Enhance pop-up when enhancing a Mod).
Melee Slam Attack Changes
As we detailed in Devstream #188, we are making changes to Melee Slam Attacks so the damage now scales with the Slam’s height (ie. how far players were from the ground when they initiated the Slam). In their previous iteration, Melee Slams could be used in disruptive ways: slams could be repeatedly performed with a large radius and no energy cost, allowing a very powerful attack to be spammed with no downsides.
To address these concerns, we have adjusted Melee Slam Attacks as follows:
- The radius of Melee Slam now scales with how high a Warframe is before initiating the slam.
- When hitting an enemy precisely with a slam (by landing on or directly beside them), there should be no noticeable change even when starting near the ground.
- Fixed how the Nira’s Mod set effect interacts with Slam for damage calculations.
- This buff used to be incorrectly applied twice, once for Slam attacks and once for Melee attacks, and it applied to itself multiplicatively — meaning +100% took 500 damage to 2,000 damage!
- Nira’s Mod set now only apply its bonus to Melee Slam Attacks.
- We have changed it to be +150% (per Mod, there are 3 Mods so it can go to +450%), up from +100% per Mod (+300% max)
- Reduced the visual effects of Melee Slam Attacks.
- This should ensure that you can still see what is going on if someone in your party is slamming to kill everything that moves in Oraxia’s Lair (totally fair reaction, by the way).
GENERAL CHANGES
- Unified the mesh and waypoint icon for in-world Arcane pickups.
- Previously, there were various different types of pickup meshes for in-world Arcane drops depending on its drop source. For example, the Techrot Safe would use the long stick-looking mesh, while the generic Mod mesh was used for Acolyctes, etc. Waypoints were also inconsistent in that some Arcanes had no waypoint or used a generic waypoint.
- Now, all dropped Arcanes use the same matching Arcane pickup mesh and Arcane waypoint!
- Made the following changes to Kaithes while in Durivi:
- Player momentum when playing as either Warframe or Drifter is better maintained upon summoning your Kaithe.
- Added improved animations for mid-air Kaithe summoning to better maintain momentum.
- Fixed Warframe’s fading in alongside the Kaithe when summoned.
- Rogue Culverin’s explosions now deal Electricity Damage instead of the unintended Tau Damage.
- We’re exploring adding Mandarin Voice Over to Warframe, starting with the Awakening and Vor’s Prize Quests. Players on the Simplified Chinese Client will automatically have Mandarin voice over enabled as part of this test.
- Players on the Simplified Chinese Client can swap between Mandarin and English Voice Over in the Audio Language settings of the launcher.
- Feral Kubrows no longer have red eyes when attempting to intimidate nearby players.
- Since update 38.6 removed their aggression, they no longer need to look so vicious when players get close.
- Updated Boon’s skin shader! New skincare routine unlocked.
- Made improvements to the path following logic for most NPC units (enemies, Companions, etc.).
- Made improvements to NPCs to help them move on and off of elevators.
- Added GI lighting to some of Citrine’s crystal projectors.
- Archwing Rush mission (Kepler, Phobos) now rewards 1500 Affinity for the destruction of a Transport Ship.
- Made improvements to water and snow displacement.
- Made improvements to throwing weapon animations to fix popping between mismatched poses and awkward head wobbling.
- Added “Randomize Colors” and “Default Colors” options to Kahl and Beast Companion customization screens.
- Increased Stalker’s tankiness in Duviri and in the Jade Shadows Quest to be on par with the Warframe Stat overhaul from Update 34 (Abyss of Dagath).
- Since the math applied to base stats was changed in U34, Stalker felt significantly squishier than Warframes in Duviri (and subsequently in Jade Shadows). We’ve updated his base stats so his in-mission values are as follows:
- Health: 1554 (was 720)
- Shield: 560 (was 300)
- Armor: 135 (was 125)
- Note: these changes only affect Playable Stalker.
- Nyx’s Mind Control can no longer be cast on immortal enemies, notably those affected by Garuda’s Blood Altar.
- This was leading to cases of Mind Control targets having obscene amounts of Bonus Damage — over a billion percent, in certain situations. While big numbers are fun, sometimes they can in fact be too big. We've removed the ability to cast Mind Control on immortal targets to prevent further unintended interactions.
- Reduced Tenet Envoy’s projectile explosion SFX when using multishot.
- Updated some of the Orokin windows with a new PBR shader.
- Changed the “Hold to Fuse” binding callout text in the Mod Menu to “Hold to Enhance”.
- As we have added quality of life changes to Mod upgrading, we’ve alternated between “Fuse” and “Enhance”. This change unifies the phrasing across the game to avoid confusion, as “Fuse” is a remnant of the old Fusion Core system.
- This also fixes issues with the binding callout text not being unified across KBM and controller.
- Made the following changes to Chroma’s Guardian Armor Augment Mod:
- Chroma now reduces the damage his squadmates take within Affinity (50m) range by 75%.
- Previously, the negated damage was dealt to Chroma’s health. We’ve removed that mechanic. Due to Vex Armor now functioning with weapon kills, we pivoted for the Augment to have better usability with Damage Reduction application.
- Duration gained per kill now scales with Ability Duration Mods.
- Bleedout Reduction Mods now apply multiplicatively instead of additively, so players can never hit 100% Bleedout Reduction.
- This change also removes the 90% Bleedout Reduction cap, which was causing issues with Last Gasp.
- Updated Burgerfest Peely Pix’s description to specify the healing amount for Allies and Defense targets, as they vary.
- Now reads: Enemies have a 5% / 10% / 15% chance of dropping Argon Burger Boxes that can be picked up to heal nearby allies by 10% and defense targets by 100.
- Kill and damage done by Caliban’s Lethal Progeny Summons will now contribute towards the End of Mission stats.
- (Missed note from previous update) Made the following changes to the Zealoid Prelate/Bastion fight:
- Zealoid Prelate/Bastion will now react properly to more weapon types/damage mechanics.
- They were previously using outdated DPS thresholds which could make them very easy to kill with specific weapons that deal massive instantaneous damage (looking at you Kuva Hek).
- Reduced Zeloid Prelate’s base Health from 11000 to 7500.
- Made the following changes to the Ambassador:
- Increased damage on auto fire from 24 to 29.
- Reduced ammo consumption of charged shot from 48 ammo to 16 ammo.
- Fixed every charged shot from doing both Impact and Radial damage in a 6 meter radius.
- This bug caused every shot to do roughly twice the damage over intended, so it was fixed to allow for the upgrades we made above!
- Adjusted dialogue volume of all Technocyte Coda members. Updated the Evolution I description for the Innodem, Keratinos, Praedos, Ruvox to specify a single Heavy Attack with x Combo multiplier is required instead of the previously written “Heavy Attacks”.
- Also updated Sarofang’s Unique Trait description from “Heavy Attacks” to “Heavy Attack”.
- Increased the Initial Combo from Evolution III Adept Reflexes perk from 15 to 20 for the Praedos and Ruvox.
- The goal with the change was to ensure that the perk can provide at least a full 2x damage.
PERFORMANCE & OPTIMIZATIONS
- Made performance improvements when volumetric fog is set to high.
- Fixed performance issues caused by Gara’s Mass Vitrify.
- Improved performance issues when opening the Void Relic and Inventory menus.
- Made tiny optimizations to launcher checks when no updated content is needed.
- Made substantial memory optimizations to shader memory when using DirectX 11.
- Made systemic micro-optimizations to DirectX 11 rendering.
- Made small optimizations to memory footprint on all platforms.
- Improved performance issues caused by Undercroft portal VFX.
- Improved performance issues caused by Trauma Clamps in the Undercroft.
- Made system memory optimizations for PC and Xbox platforms
- Improved performance issues related to the End of Mission screen.
- Fixed performance issues caused by Kuva Ogris’ explosion lights.
- Made optimizations to Nintendo Switch memory usage.
- Fixed more cases of Quest spot-loading with a Dragon Key equipped.
- Took steps towards improving performance in Stage Defense missions.
- We continue to investigate other ways in which we can address performance issues in Stage Defense — thank you Tenno!
- Optimized game startup, particularly first boot after installing.
- Made a tiny optimization in game load time.
- Optimized video loading in the Drifter Abilities and Railjack Intrinsics screens.
- Made optimizations to weapon selection segments of the Awakening Quest.
- Made small optimizations to game startup time and memory footprint throughout the whole game.
- Fixed a memory leak when opening the map with Oxylus' Scan Matter equipped. This was causing the game to freeze for extended periods of time.
There's also a great deal of bug fixes that have not been listed here, but if you so choose, you can check them out in the official Forum article. Stay tuned for more Warframe guides and news on Sportskeeda:
- All Warframes tier list
- Warframe Incarnon weapons tier list
- Warframe Kuva weapons tier list
- Warframe Coda weapons tier list
- Best weapons in Warframe for each Mastery Rank
Why did you not like this content?
- Clickbait / Misleading
- Factually Incorrect
- Hateful or Abusive
- Baseless Opinion
- Too Many Ads
- Other
Was this article helpful?
Thank You for feedback
About the author

Edited by Sambit Pal
 English (US)