
.jpg) 14 hours ago
1
14 hours ago
1
![]()
Minecraft 1.21.8 Optifine has just received the latest support build, allowing players to use shaders and graphical customizations alongside the content in the Chase the Skies drop. OptiFine is one of the most popular mods for adding and using shaders, transforming the vanilla world into endless universes.
Here's how you can download and install Minecraft 1.21.8 Optifine.
Note: OptiFine 1.21.8 is currently released as a preview. Players are requested to proceed with caution as the game might crash or shut down unexpectedly.
How to install Minecraft 1.21.8 Optifine
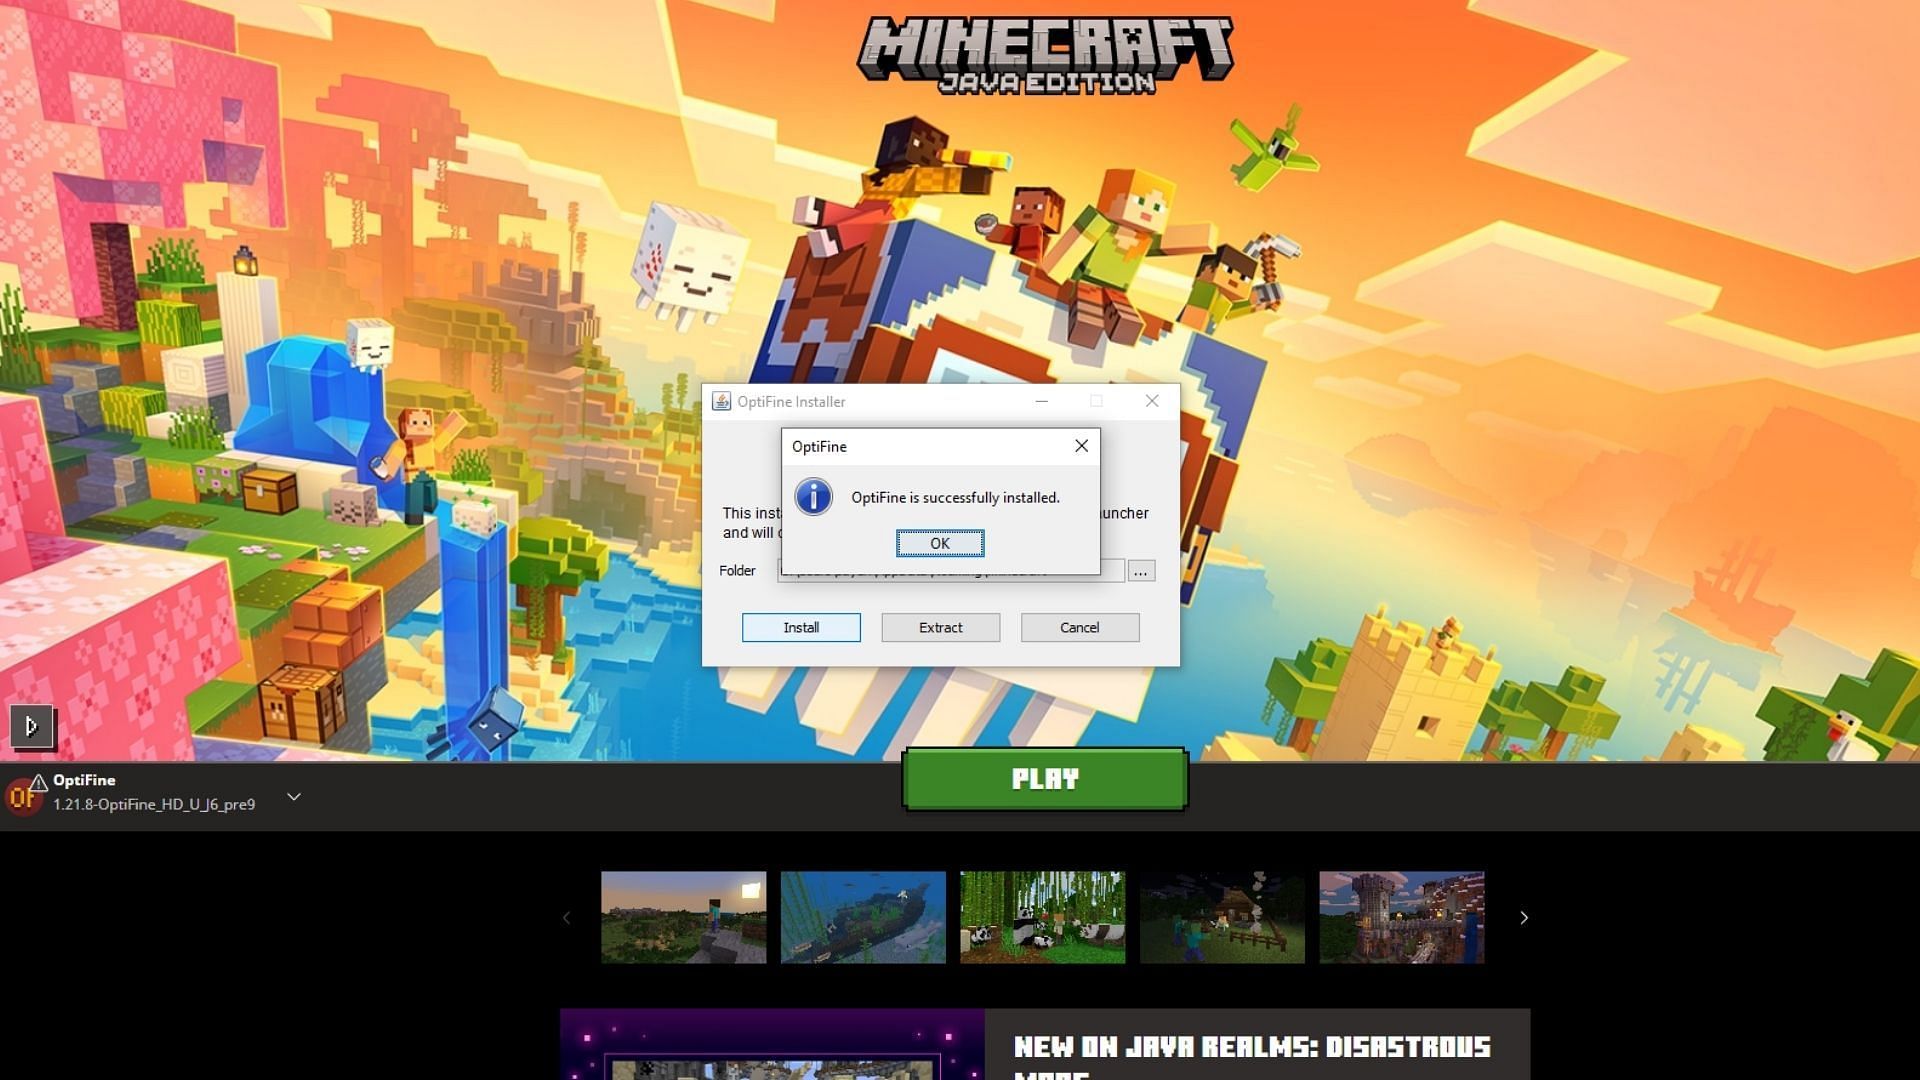 Follow this guide to download and install Minecraft 1.21.8 Optifine (Image via Sportskeeda Gaming || Mojang Studios)
Minecraft 1.21.8 OptiFine can be installed using the official installer found on their website. As of now, OptiFine has released a preview version that is compatible with the latest Chase the Skies game drop, introducing support for new mobs and items such as the happy ghast and the harness.
Here's how you can download and install Minecraft 1.21.8 Optifine:
- Head over to the OptiFine download website.
- Under Minecraft 1.21.8, click the Preview Versions tab and expand it.
- Download the latest OptiFine preview under the tab and run the Jar file.
- Once the installer opens, select Install. Additionally, if you wish to change the installation directory, you can click on the three dots on the right and make the necessary changes.
- Next, click Install and wait till you get a confirmation pop-up box stating OptiFine 1.21.8 has been installed.
- Head over to the Minecraft launcher and check if Minecraft 1.21.8 Optifine is showing up on the list of available instances under Java edition.
Also read: How to use shaders in Minecraft 1.21.8
How to use Minecraft 1.21.8 Optifine
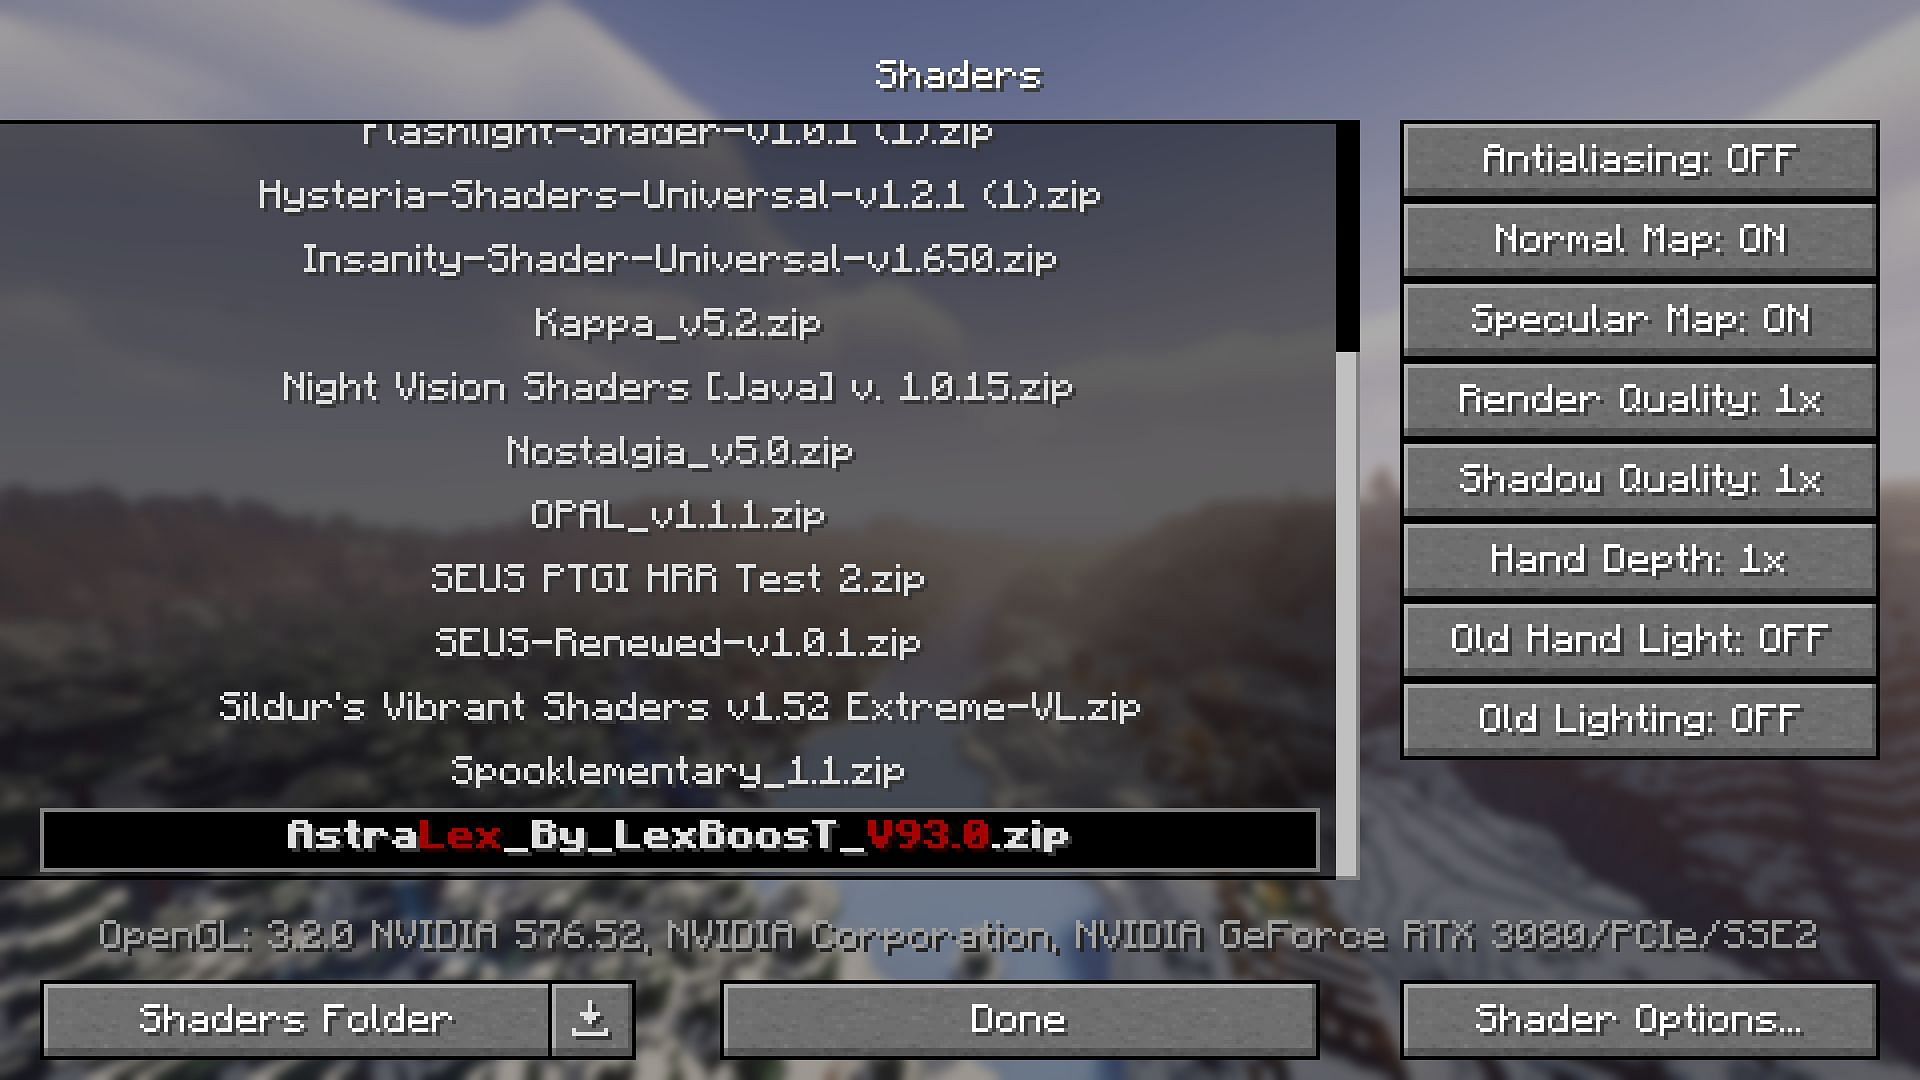 Use Minecraft 1.21.8 Optifine to transform the visual identity of your vanilla worlds (Image via Sportskeeda Gaming || Mojang Studios)
Once you have installed OptiFine, head to the Minecraft launcher and select the Java edition of the game. Now, navigate to and load the instance with Optifine 1.21.8 installed. It is usually the latest one selected after you open the launcher once you are done with installation.
Once you have found the instance with Minecraft Optifine for 1.21.8 installed, run it and follow these steps:
- Download a shader of your choice from online repositories like Curseforge or Modrinth.
- Open the instance of Minecraft with Optifine installed.
- Navigate to the Options menu on the Minecraft loading screen.
- Next, select the Video settings menu and click on the Shaders button.
- Click the Shader Folder button at the bottom, which will open up the shaders directory.
- Now, drag and drop your downloaded shader(s) into this folder. You can skip this step if you already have shaders available.
- Close the folder and head back to Minecraft. You will notice that the shader(s) you placed are now displayed in the list. Additionally, you can also click on the download icon next to the Shader Folder button to access a list of popular shaders curated by Shaderlabs.
- Select your desired shader from the list and wait a few moments while it gets applied.
- Click done and head back to the game to enjoy the new visual enhancements brought by the pack.
Additionally, you can also click on a Shader and then select the Shader options button on the bottom-right to modify the settings of a pack to suit your requirements. Most packs will offer you options that allow you to fine-tune aspects such as lighting, fog, water behavior, and more. Once you are satisfied with the changes, click Done and save your changes to apply them.
Also read: Best Minecraft hollow mountain seeds
Check out our other Minecraft articles:
- How to get and use the Minecraft Reese's Sodium Options mod
- One happy ghast feature in Minecraft clearly doesn't make sense
- How to get boss mob spawn eggs in Minecraft
- How to get Minecraft 1.21.5 X-ray pack
- 4 best mods to bring mobs to life
- All fishing enchantments explained
Why did you not like this content?
- Clickbait / Misleading
- Factually Incorrect
- Hateful or Abusive
- Baseless Opinion
- Too Many Ads
- Other
Was this article helpful?
Thank You for feedback
About the author

Edited by Sayendra Basu
 English (US)