The second weekly reset in Destiny 2's Ash & Iron update brought forth a new set of collectibles. These collectibles are attached to the latest seasonal challenges in Week 2 of Ash & Iron, where players can get increased EXP after collecting all of them and completing the challenges. There are 10 total cache locations available across different activities this week.
This article lists all the Missives in the Golden Age caches in Week 2 of the Ash & Iron update.
All 10 Golden Age caches in Destiny 2: Ash & Iron Week 2
The Insight Teminus #1:
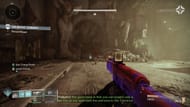 First log within The Insight Terminus Strike of Destiny 2 (Image via Bungie)
 Capture the plate and go through the portal. After getting stuck on the 'loading' part, instead of going right, walk straight towards the Vex statue, and a log will be present there.
The Insight Terminus #2:
 The second log is just behind the large circular door (Image via Bungie)
 Before the final boss, and after opening the circular door in the large room, a log can be found just after entering through the doorway.
Battleground Core #1:
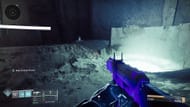 First log in Battleground Core near the first portal (Image via Bungie)
 After clearing all nine Blights, including the huge Blight in the opening encounter, look for the log on the left before jumping into the portal.
Battleground Core #2:
Before jumping into the final boss fight, look for the log behind the rally banner circle mark.
Tomb of Elders Path A (Pyramid room):
 Log located inside Pyramid room of Tomb of Elders (Image via Bungie)
 From the entrance, take a left and walk towards the back side of the room. The log should be present at the base of a glowing red pipe on the floor.
Tomb of Elder Path B (final boss room):
 Final boss path in Tomb of Elders (Image via Bungie)
 From the entrance, take a right and jump up on the metal floors. The log should be to your left.
Tomb of Elders Path C (Savathun Hive room):
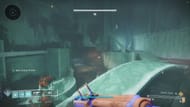 Hive room in Tomb of Elders of Destiny 2 (Image via Bungie)
 From the entrance, look for the log in one of the upper-left platforms. It should be glowing and visible to you from a distance.
Pit of Herey Beneath the Necropolis:
 Log in the Chamber of Suffering encounter (Image via Bungie)
 In the Chamber of Suffering encounter, head to the middle of the arena, and look for the log on the right of the depositing altar.
Reclaim Archon's Keep: Cabal's Watch
 Log location in Cabal's Keep Dome (Image via Bungie)
 After spawning, head all the way to the back of the arena with a circular dome on the right.
Enter the dome, and look for the log inside a small room on the left.
Reclaim Fallen Bunker: The Divide
 Log in the Divide of Fallen Bunker (Image via Bungie)
 After spawning, take a hard right and stay on the edge by sticking to the railings. Keep going, and you will find the log near one of the railings.
Check out our Destiny 2 guides:
- Edge of Fate Destiny 2 power cap guide.
- Can you complete The Edge of Fate campaign solo?
- Imminence god roll guide
- Easiest way to get the Queenbreaker Catalyst
- Do you need to play past expansions for The Edge of Fate?
- How big is The Edge of Fate update?
- How many campaign missions are in The Edge of Fate?
- Last Thursday god roll guide
- Giver's Blessing god roll guide
- Epoptes boss encounter guide in The Desert Perpetual
Why did you not like this content?
- Clickbait / Misleading
- Factually Incorrect
- Hateful or Abusive
- Baseless Opinion
- Too Many Ads
- Other
Was this article helpful?
Thank You for feedback
About the author
Edited by Soumyadeep Banerjee

.jpg) 2 hours ago
2
2 hours ago
2

 English (US)